
Building a desktop electron app with Next.js - part two
Introduction
This is part two of a three part series on building Electron apps with Next.js. You can find part one here, and part three should be available in July 2024. You should also join the ⚡️electrokit.dev waitlist to be the first to know when I release a pre-packaged, shippable Electron starter kit containing everything I've learned building these apps and writing these articles.
In part two of this series we're going to add some features to the basic application we built in part one, where we sacrificed functionality in favour of getting something shipped. Let's review what Chomp Git does so far:
- Allows users to select one or more git repositories from their local filesystem
- Shows a chronological 'feed' of commits from those repositories, much like a social media timeline
- Shows the status of each repository (upstream and working directory status) in the left-hand sidebar
If you followed along with part one, you should have a working application which looks a bit like this:

In this article, we're going to add:
- An improved timeline layout
- Navigation between the timeline view and a new repository view, while preserving app state
- A list of top contributors on the repository view
- Persistent state to preserve the list of repositories across application restarts
- Various small aesthetic tweaks which add up to make the application feel more native
Making the window draggable
First up, we need to fix a glaring ergonomic oversight from part one: we can't move the window! Removing the window's title bar also removed the ability to drag the window around. This is an embarassing bug, but luckily the fix is simple: we can specify which regions of the window are draggable by defining a new CSS class (Tailwind doesn't provide a utility class out of the box) and selectively applying it to our markup wherever we want a region to be draggable:
/* styles/globals.css */

.drag {
  -webkit-app-region: drag;
}
Locate the h1 element in home.tsx surrounding the 'Chomp Git' text and add the drag class to it:
<h1 className="drag h-10 font-semibold text-gray-300 flex items-center justify-end border-b border-stone-800 mr-3">
  <div className="flex items-center gap-1">
    Chomp Git <ChatBubbleOvalLeftEllipsisIcon className="h-6 w-6" />
  </div>
</h1>
You can now drag the window around by dragging the element which most people will intuitively recognise
as the application's title bar. You can - and should - selectively add the drag class wherever it makes sense
to do so, but this will do for now.
Fixing the base font size
If you took a look at Vadim's excellent article on Making Electron apps feel native linked in part one, you might have noticed this one already: the default Tailwind font size of 16px is just a bit too big for native apps. That makes the next thing we're going to tackle nice and easy:
/* styles/globals.css */
@tailwind base;
@tailwind components;
@tailwind utilities;

html {
  font-size: 14px;
}
Resulting in something like this:
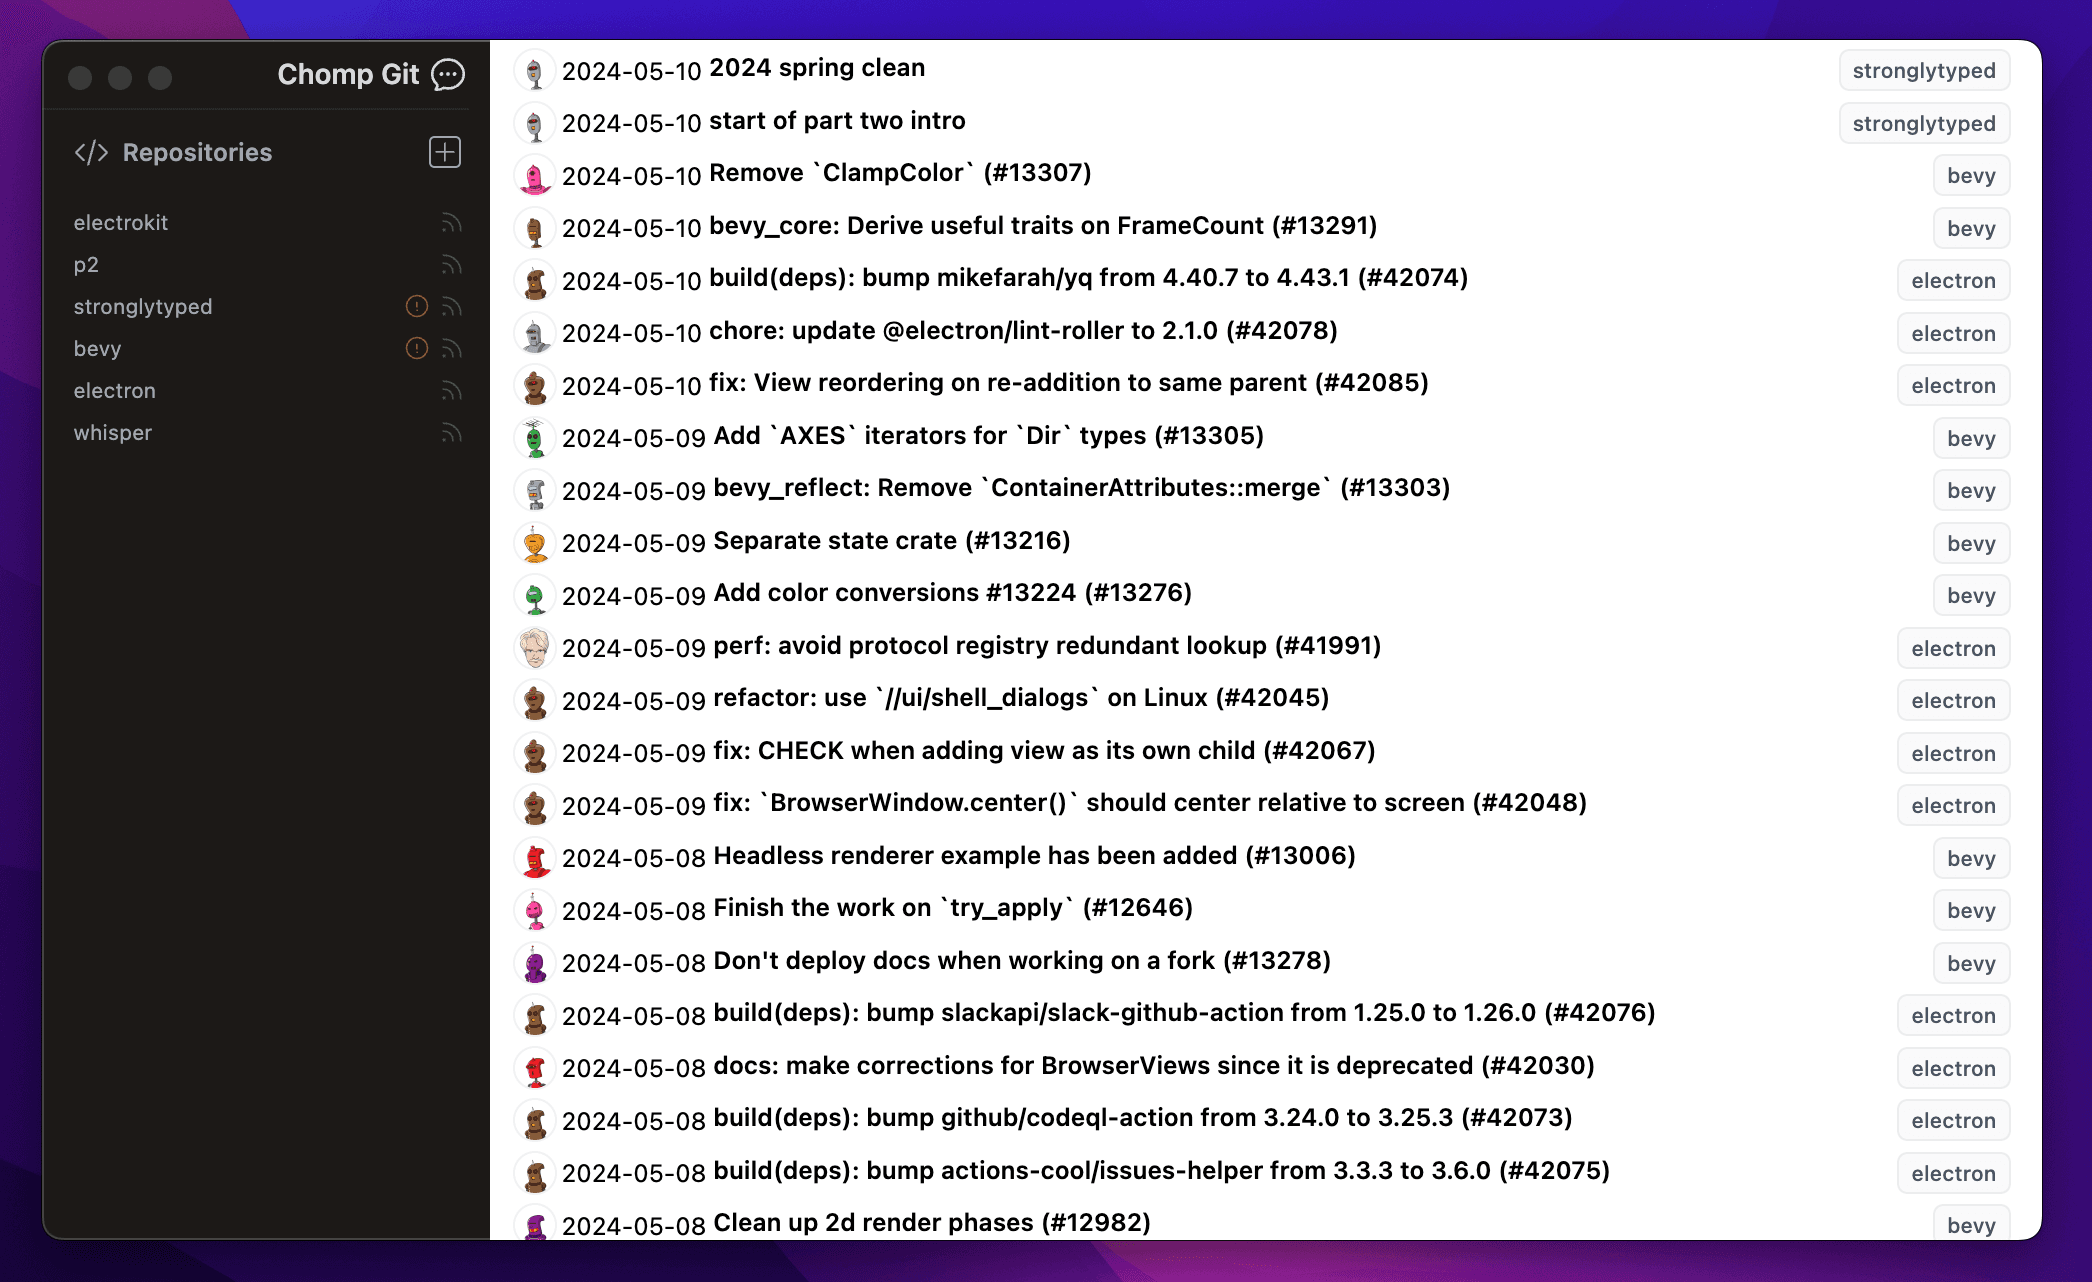
This might feel cramped at first - especially with that timeline view as it is - but you'll very quickly get used to it and won't be able to go back. It was important to tackle this one early since it will have an impact on every other layout and design change we make. Speaking of which, it's time to take a look at that timeline layout.
Improving the timeline layout
I'm not doing to dwell on this for long because the focus of these articles is on practical advice on building Electron apps with Next.js, not designing them.
But a few minutes spent tweaking the layout of the timeline view will make a big difference to how the application feels, especially since we're going to be
spending a lot of time looking at it. Open up home.tsx and locate the main content container which iterates over each commit. Replace it with:
<div className="pl-64">
  <div className="divide-y divide-gray-100">
    {commits.map((commit, i) => (
      <div key={i} className="p-3 hover:bg-gray-50">
        <div className="flex gap-2 mb-2 items-center text-gray-900">
          <div>
            <Image
            src={`https://www.gravatar.com/avatar/${commit.avatarHash}.jpg?d=robohash`}
            width={26}
            height={26}
            className="w-6 h-6 rounded-full ring-1 ring-teal-400/70 bg-gray-100"
            alt=""
            />
          </div>
          <div className="font-medium text-xs">{commit.author_name}</div>
          <div className="text-xs">{commit.date.substring(0, 10)}</div>
          <span className="rounded-md bg-gray-50 px-2 py-1 text-xs font-medium text-gray-600 ring-1 ring-inset ring-gray-500/10">
            {commit.repository}@{commit.hash.substring(0, 7)}
          </span>
        </div>
        <div className="ml-0 w-full flex justify-between">
          <span className="text-sm ml-8 text-gray-700">{commit.message}</span>
        </div>
      </div>
    ))}
  </div>
</div>
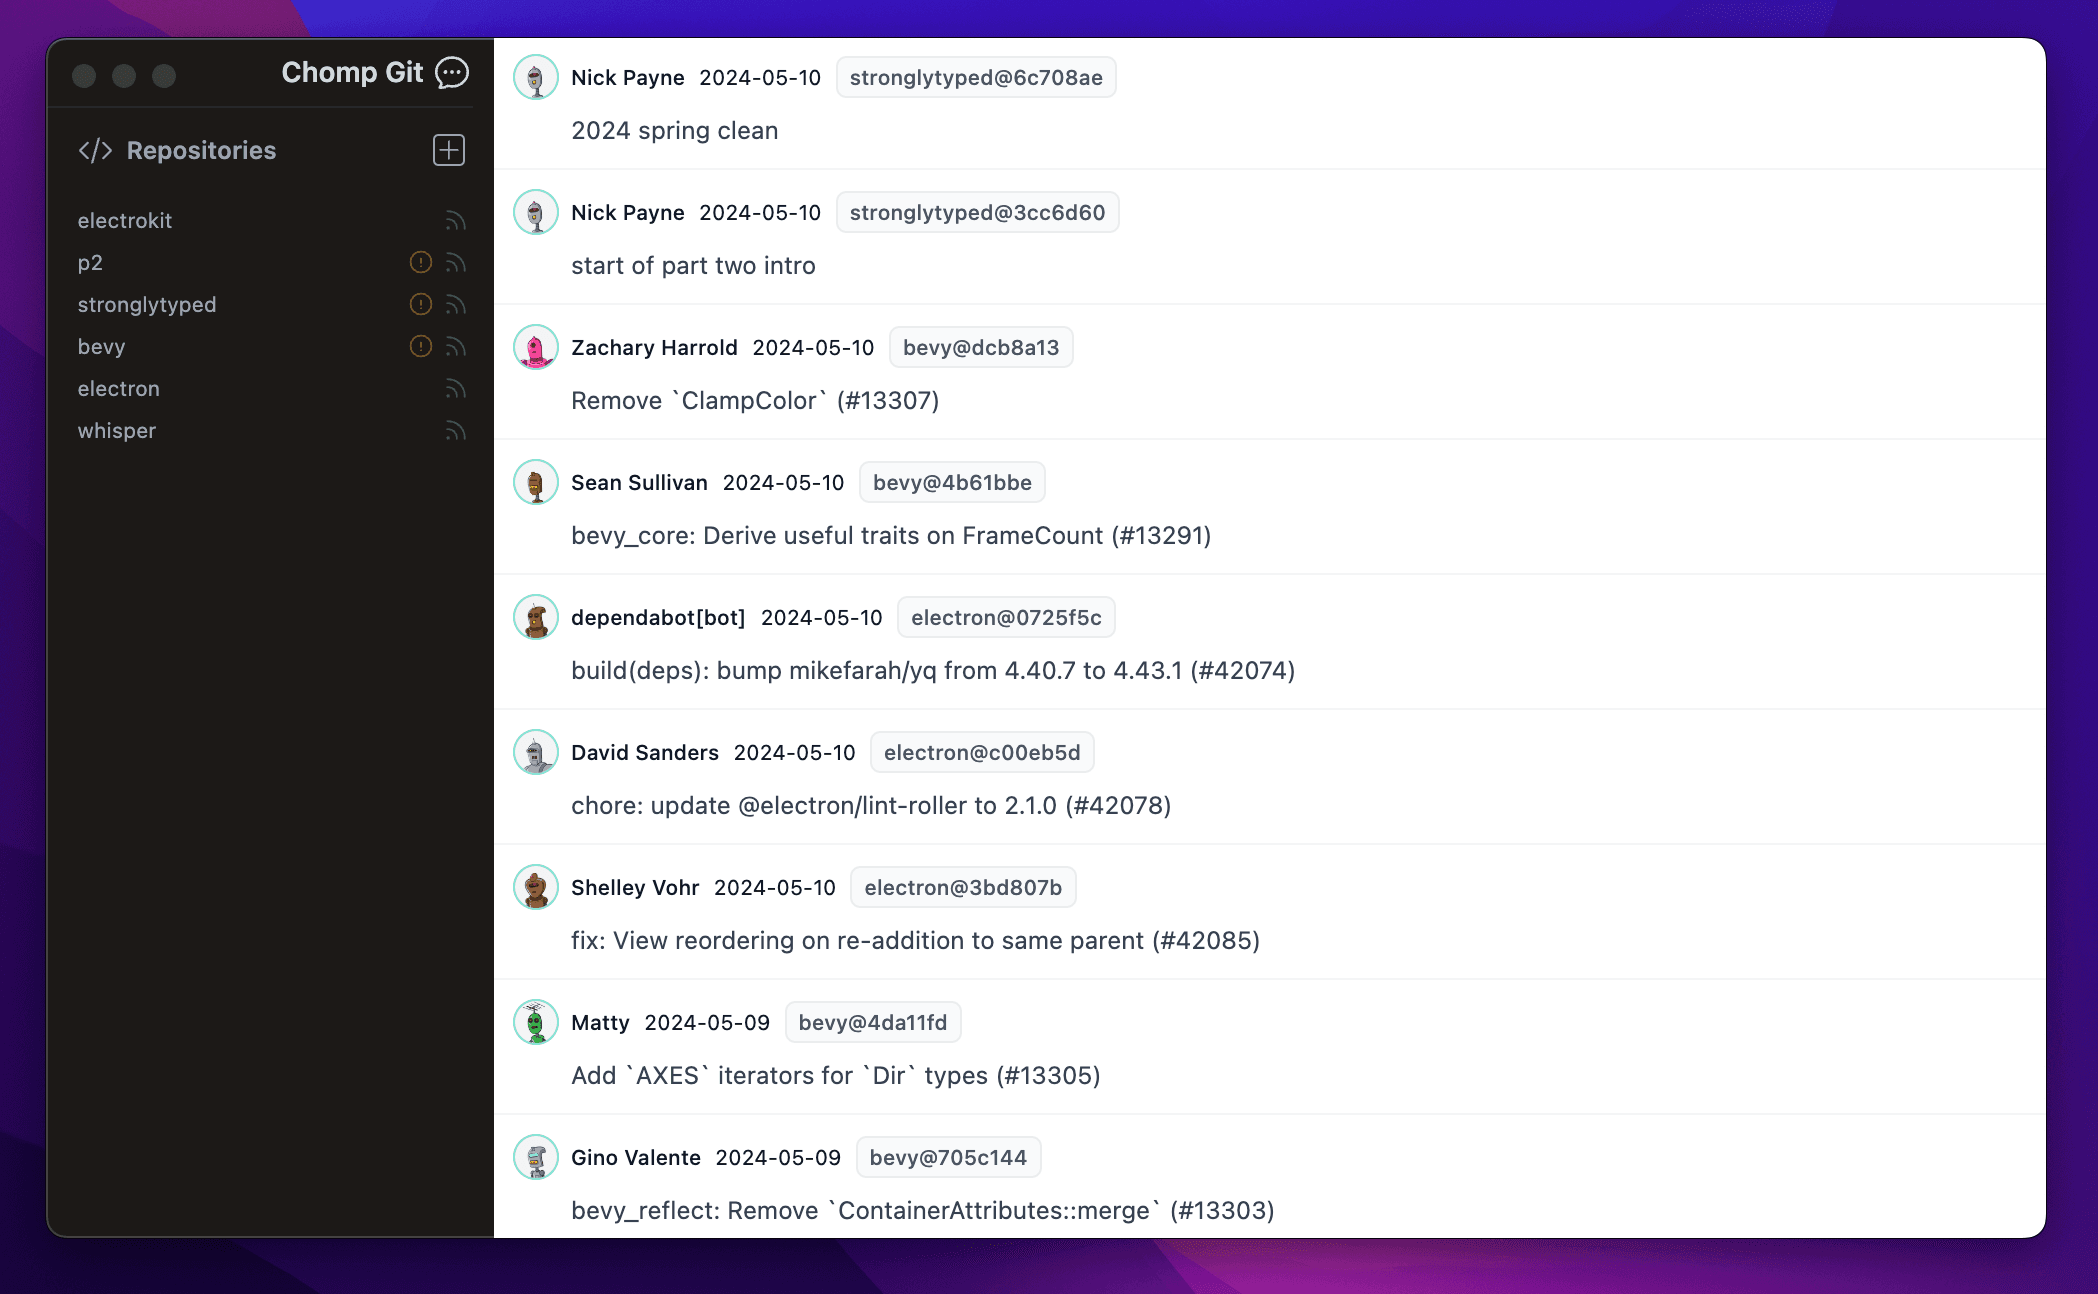
Note that the pl-64 container previously applied horizontal and vertical margins which have been removed, giving the component inside it
more choice about how it sits relative to the sidebar rather than enforcing a fixed gutter around it:
Persisting state across application restarts
Next up is a quality-of-life improvement which will massively improve the user and development experience: persisting the list of repositories
across application restarts.
Persistent state management is a whole topic in itself, but for now we're going to keep
it simple and use the electron-store package which Nextron
already ships with (it uses it to save and restore window size and position). We're going to use it to save and restore
the repositories a user has selected.
Since most of the actual repository state (working directory status, commits, upstream availability) is already
stored on disk, we only need to save the list of fully qualified directories pointing to each repository.
In a real application you'll inevitably need to store (and restore) more complex state, but this should give you an idea of how to
do so. First of all, let's create a basic type to represent each repository. Create a new file at main/shared/types.ts:
import { DefaultLogFields, ListLogLine } from "simple-git"

type Commit = (DefaultLogFields & ListLogLine)

export type Repository = {
  path: string
  name: string
  hasRemote: boolean
  isClean: boolean
  commits: readonly Commit[]
}
And create a new file at main/repositories.ts:
import Store from 'electron-store'
import { Repository } from './shared/types'
import simpleGit from 'simple-git'

type RepositoryStore = {
  paths: string[]
}

export const loadRepositories = async (): Promise<Repository[]> => {
  const store = new Store<RepositoryStore>()
  const paths = store.get('paths', [])

  return await Promise.all(paths.map(repoFromPath))
}

export const storeRepositories = (repositories: Repository[]) => {
  const store = new Store<RepositoryStore>()
  store.set(
    'paths',
    repositories.map((repo) => repo.path)
  )
}

export const repoFromPath = async (path: string): Promise<Repository> => {
  const git = simpleGit(path)
  return {
    path,
    name: path.split('/').slice(-1)[0],
    hasRemote: (await git.getRemotes()).length > 0,
    isClean: (await git.status()).isClean(),
    commits: (await git.log()).all,
  }
}
Note that while we're only persisting the directory paths for each repository, we're abstracting that away behind the store and load interfaces, making it easier to persist more state in the future.
Loading and saving the repositories is simple. Open main/handlers.ts:
import { dialog, ipcMain } from 'electron'
import crypto from 'crypto'
import { loadRepositories, repoFromPath, storeRepositories } from './repositories'
import { Repository } from './shared/types'

export const bindHandlers = () => {
  ipcMain.handle('select-repositories', async () => {
    const { filePaths } = await dialog.showOpenDialog({ properties: ['openDirectory', 'multiSelections'] })
    const repositories = await loadRepositories()

    for (const path of filePaths) {
      if (repositories.find((repository) => repository.path === path)) continue
      try {
        const repository = await repoFromPath(path)
        repositories.push(repository)
      } catch (e) {
        // probably not a git repository; ignore
      }
    }

    storeRepositories(repositories)
    return repositories
  })

  ipcMain.handle('get-recent-commits', async () => {
    const repositories = await loadRepositories()

    const commits = repositories.flatMap((repository) =>
      repository.commits.map((commit) => ({
        repository: repository.name,
        avatarHash: crypto.createHash('md5').update(commit.author_email).digest('hex'),
        ...commit,
      }))
    )
    return commits.sort((a, b) => new Date(b.date).getTime() - new Date(a.date).getTime()).slice(0, 500)
  })
}
Note that loading and saving repositories to and from disk all the time is inefficient, so don't do it in a tight loop anywhere. A relatively straightforward improvement would be to store the currently list of loaded repositories in memory; I'm only avoiding it here for maximum simplicity.
With these small changes, we have persistent state: here's what my configuration file looks like for the repositories used in these screenshots:
{
	"paths": [
		"/Users/np/code/electrokit",
		"/Users/np/code/p2",
		"/Users/np/code/stronglytyped",
		"/Users/np/code/other/bevy",
		"/Users/np/code/other/electron",
		"/Users/np/code/other/whisper"
	]
}
We've got a problem though: we're only loading that state when the select-repositories
handler is invoked, which only happens when a user selects a repository to add. The application still starts off with
a blank screen even though a saved list of repositories is available, so we need to find a way of loading the list
of repositories on startup and passing them through to the renderer process. I like doing this with a home-rolled
onready handshake process.
Adding an onready handler
Doing something when an application or window is ready is an extremely common requirement, and while the former is
solved natively in Electron by awaiting the app.whenReady() method, the latter is not, or at least not particularly well.
In theory, awaiting the result of window.loadUrl(...) will only resolve when the page has loaded, but in practice I've
never found it reliable, and always needed more fine-grained control. For these reasons, I have the main window explicitly
emit a ready event - when I decide it is ready - which the main process listens for and responds to with whatever initial state the application needs.
Let's start with the window side of things: we need to expose a new IPC method which it can use to signal readiness to the main process. Add a new
signalReady() method to the IpcHandler interface in main/preload.ts:
const { contextBridge, ipcRenderer } = require("electron")

const handler = {
  selectRepositories: () => ipcRenderer.invoke("select-repositories"),
  getRecentCommits: () => ipcRenderer.invoke("get-recent-commits"),
  signalReady: () => ipcRenderer.invoke('ready'),
}

contextBridge.exposeInMainWorld("ipc", handler)

export type IpcHandler = typeof handler
Invoking it is as simple as adding a useEffect hook inside our Home page component:
useEffect(() => {
  // any other initialisation code can go here...

  // useEffect can't be async, but we can invoke an async function inside it
  const onReady = async () => {
    const { repositories, commits } = await window.ipc.signalReady()
    setRepositories(repositories)
    setCommits(commits)
  }

  onReady()
}, [])
If you run the application at this point it will crash because the main process isn't handling
the ready event, so let's go ahead and add a new handler. We'll refactor some code while we're at it to avoid
introducing unnecessary duplication. Your main/handlers.ts should now look something like this:
import { dialog, ipcMain } from 'electron'
import crypto from 'crypto'
import { loadRepositories, repoFromPath, storeRepositories } from './repositories'
import { Repository } from './shared/types'

export const bindHandlers = () => {
  ipcMain.handle('ready', async () => {
    const repositories = await loadRepositories()
    const commits = await getRecentCommits(repositories)
    return { repositories, commits }
  })

  ipcMain.handle('select-repositories', async () => {
    const { filePaths } = await dialog.showOpenDialog({ properties: ['openDirectory', 'multiSelections'] })
    const repositories = await loadRepositories()

    for (const path of filePaths) {
      if (repositories.find((repository) => repository.path === path)) continue
      try {
        const repository = await repoFromPath(path)
        repositories.push(repository)
      } catch (e) {
        // probably not a git repository; ignore
      }
    }

    storeRepositories(repositories)
    return repositories
  })

  ipcMain.handle('get-recent-commits', async () => {
    const repositories = await loadRepositories()
    return await getRecentCommits(repositories)
  })
}

const getRecentCommits = async (repositories: Repository[]) => {
  const commits = repositories.flatMap((repository) =>
    repository.commits.map((commit) => ({
      repository: repository.name,
      avatarHash: crypto.createHash('md5').update(commit.author_email).digest('hex'),
      ...commit,
    }))
  )
  return commits
    .sort((a, b) => new Date(b.date).getTime() - new Date(a.date).getTime())
    .slice(0, 500)
}
With these changes in place you should see your list of repositories restored when the application starts up. There's just one more rough edge which needs smoothing over: we can see various loading states unfold as the application starts up.
Hiding the window until it's ready
You can mask this loading state, or choose to lean into it, any way you want. I'm going to do the simplest possible thing which is
to hide the main window until it signals that it is ready. Due to our custom events, we know that "ready" means not only
has the URL loaded, but Next.js has initialised and our useEffect() hook has fired.
First up, let's hide the window on creation. Open main/background.ts and locate the code around the createWindow() call.
Instruct the window not to show, and pass the window reference to the bindHandlers() function:
const mainWindow = createWindow('main', {
  width: 1000,
  height: 600,
  titleBarStyle: 'hiddenInset',
  webPreferences: {
    preload: path.join(__dirname, 'preload.js'),
  },
  show: false,
})

bindHandlers(mainWindow)
The bindHandlers function isn't expecting this parameter yet. We're about to change that, and at the same time
use the provided window reference to show it in our recently-added ready handler:
export const bindHandlers = (window: BrowserWindow) => {
  ipcMain.handle('ready', async () => {
    const repositories = await loadRepositories()
    const commits = await getRecentCommits(repositories)
    window.show()
    return { repositories: filterRepositories(repositories), commits }
  })

  // other handlers omitted for brevity
}
The above isn't perfect because the window is shown before being sent the list of repositories. I'll leave that one as an optional exercise for the reader! Nevertheless, we've now got state which persists across restarts, a more polished loading experience and a custom ready handshake you can extend to your liking.
Navigating between views
It's time to create the detailed view for each repository and wire up navigation between the two views. Since nextron uses Next.js
for the renderer process, it makes sense to leverage the routing capabilities already provided: our views will be separate
page components, and we'll use the Link component from next/link to navigate between them. Let's make each repository
listed in the sidebar a link to a non-existent page we'll create shortly. Locate the ul element inside home.tsx which maps
over the list of repositories and replace it with:
<ul className="mt-5 ml-1 space-y-2 text-xs">
  {repositories.map((repo, i) => (
    <li key={i}>
      <Link
        href={`/repository/${repo.name}`}
        className="flex items-center text-gray-400 hover:text-gray-200 justify-between"
      >
        {repo.name}
        <div className="flex gap-1 items-center">
          {!repo.isClean && <ExclamationCircleIcon className="h-4 w-4 text-yellow-400/40" />}
          {repo.hasRemote && <RssIcon className="h-4 w-4 text-green-400/40" />}
        </div>
      </Link>
    </li>
  ))}
</ul>
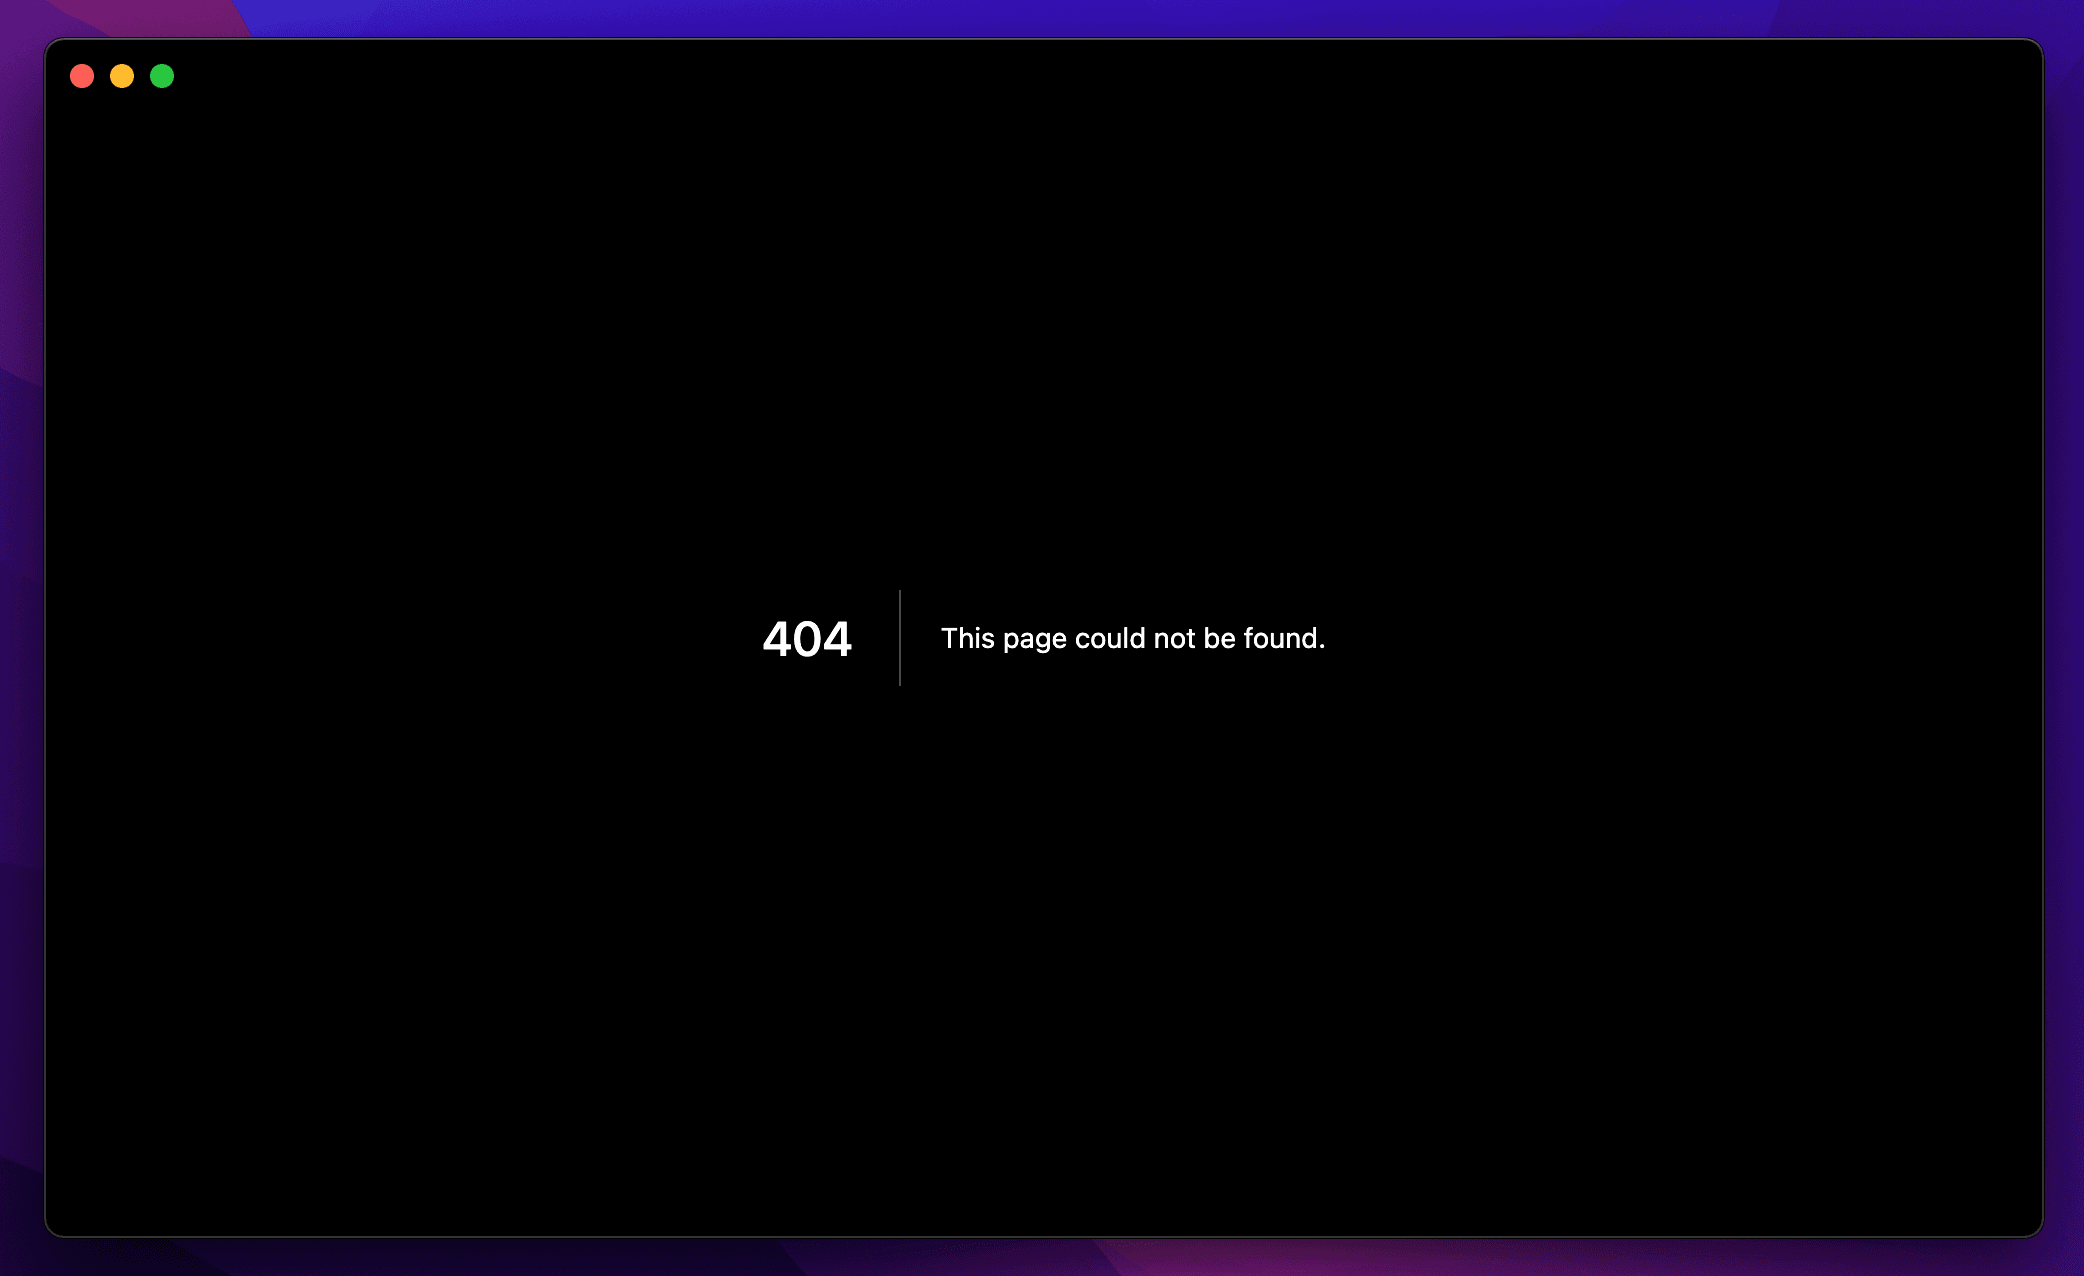
As an aside, the above is one good reason to jump from Next.js 12 to 13 as we did in part one: 12 wouldn't let us
embed a div inside a Link, but 13 has no complaints. It should come as no surprise that clicking any of the links
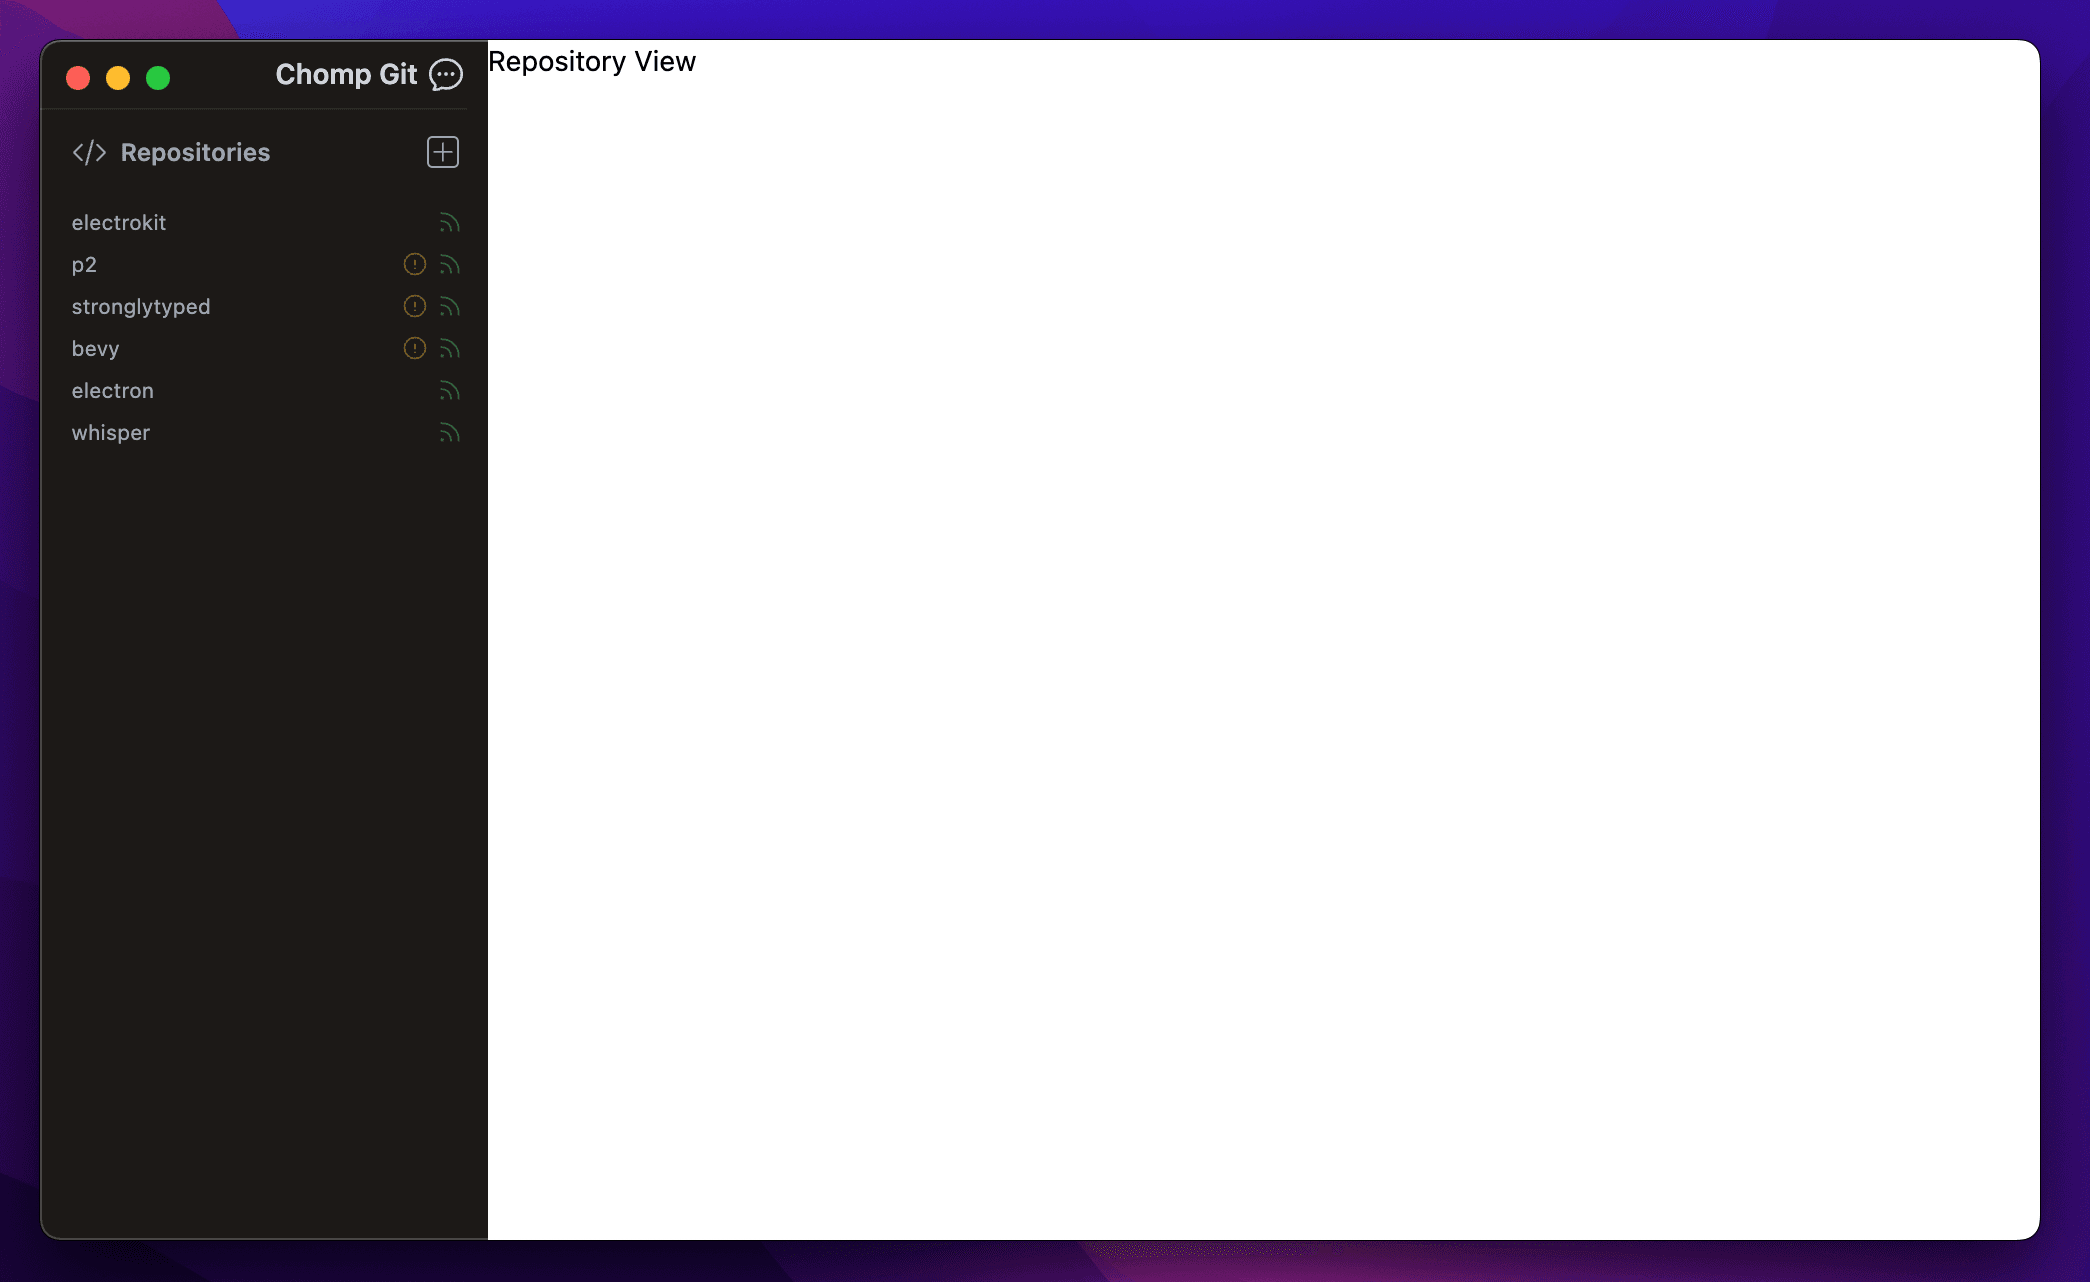
doesn't work yet but instead shows the standard Next.js 404 page:
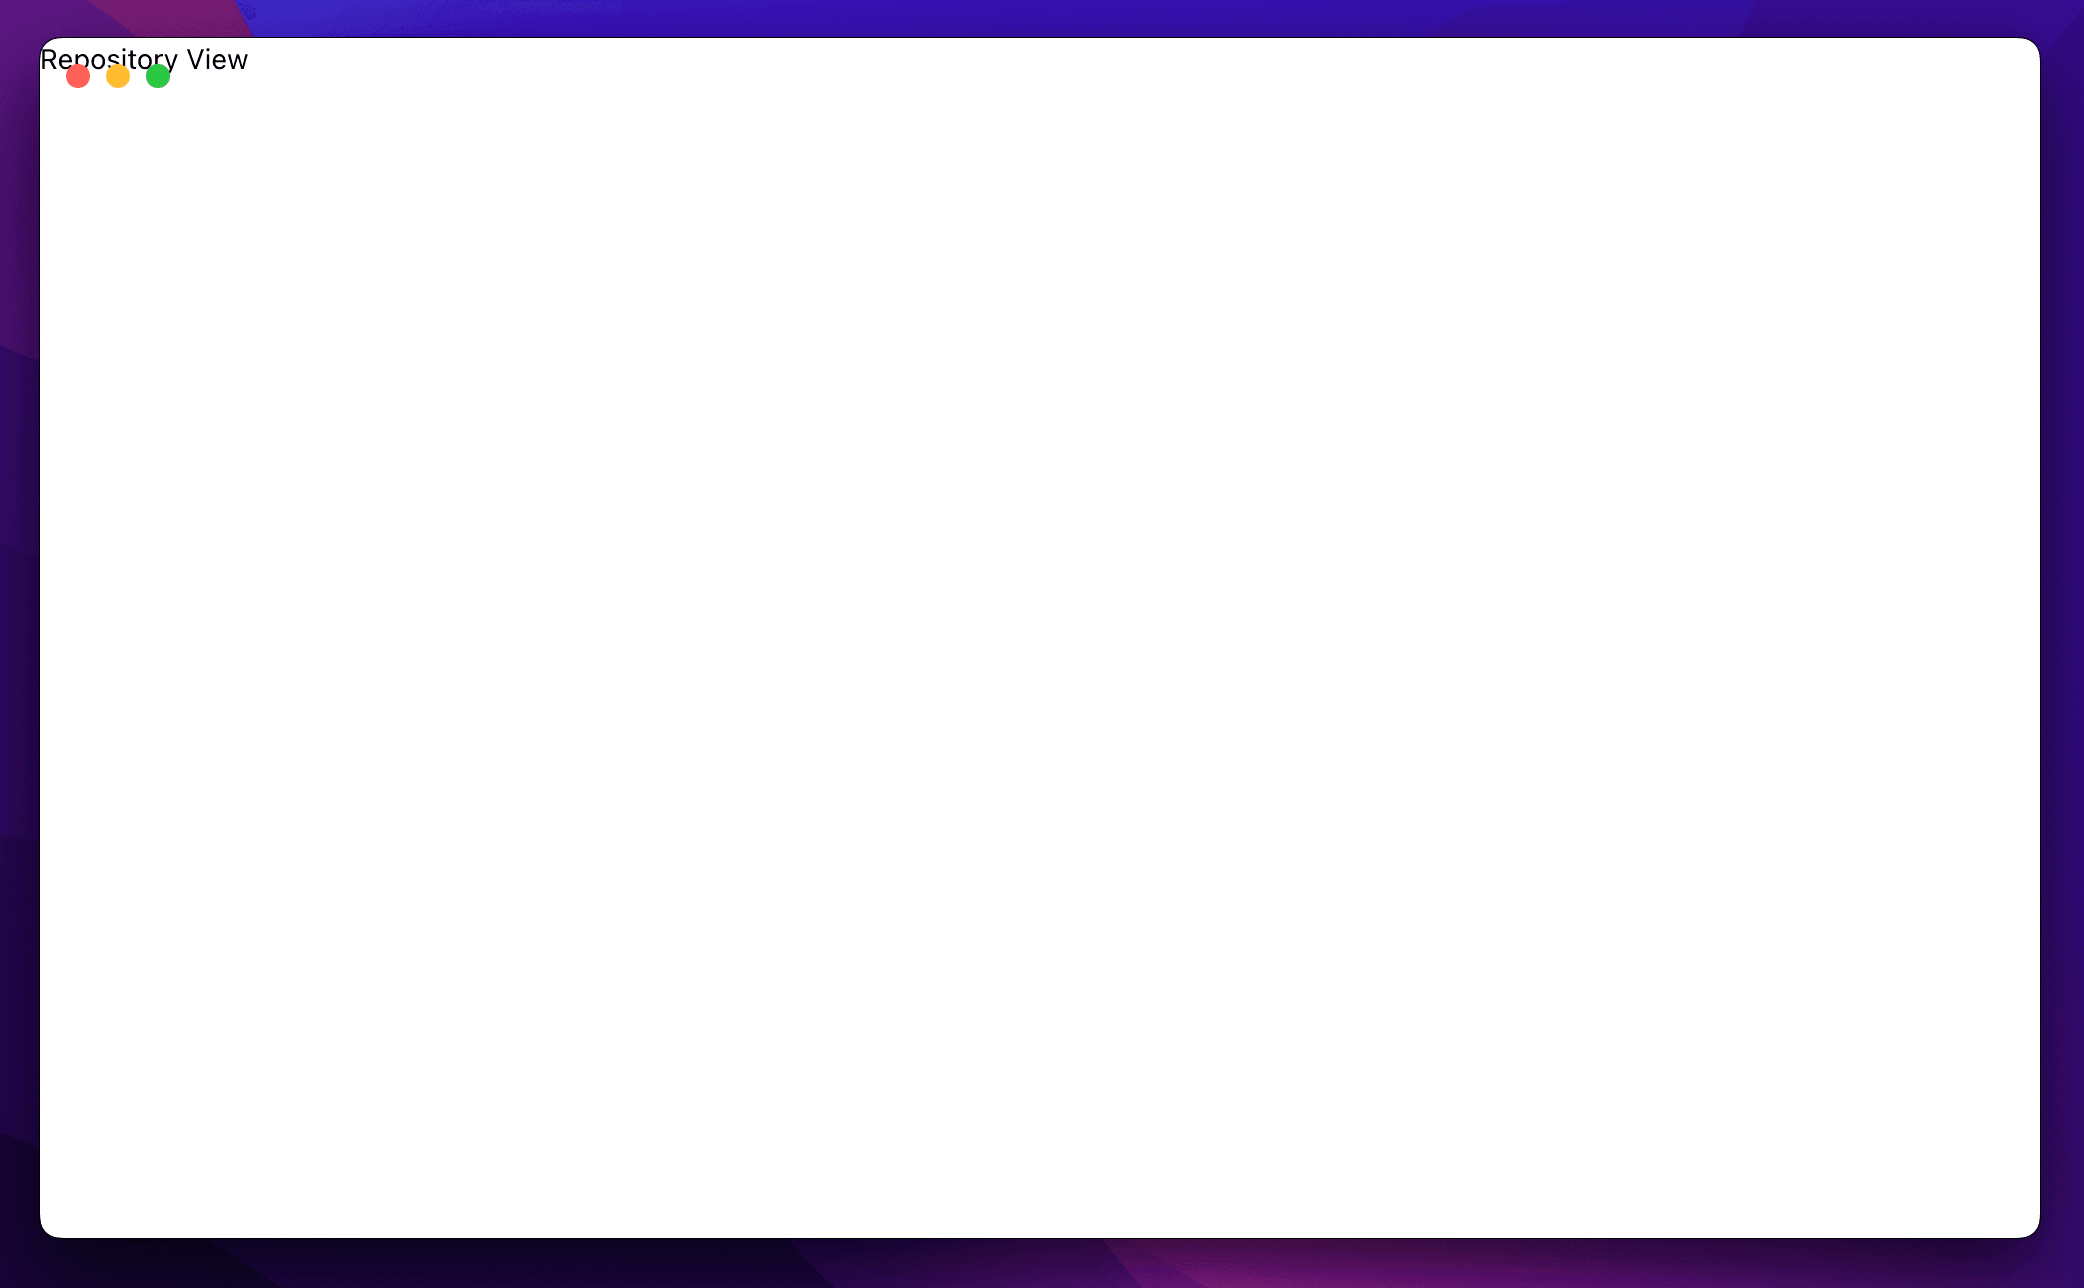
Creating a placeholder file at renderer/pages/repository/[name].tsx gets us a little further:
export default function RepositoryView() {
  return (
    <div>
      <h1>Repository View</h1>
    </div>
  )
}
However, we've got a couple of glaring issues we need need to address:
- We've lost the application layout: no sidebar, no draggable title bar, no content pane
- We've lost the application state: the list of repositories and timeline of commits
Much like linking between views, both of these issues are solved the same way you'd solve them in any Next.js application using the pages router. In order:
- We will create a layout component and refactor our home and repository pages to use it
- We will create a context provider to manage application state and wrap our components in it
Creating a layout component
This is pretty straightforward: we want the title and the sidebar to be present on every page, and the content
to be rendered inside the main container with the white background. Create a new file at renderer/components/Layout.tsx, and
temporarily hoist everything from home.tsx into it:
import {
  ChatBubbleOvalLeftEllipsisIcon,
  CodeBracketIcon,
  ExclamationCircleIcon,
  PlusIcon,
  RssIcon,
} from '@heroicons/react/24/outline'
import Link from 'next/link'
import Image from 'next/image'
import { useEffect, useState } from 'react'

export default function Layout({ children }: { children: React.ReactNode }) {
  const [repositories, setRepositories] = useState([])
  const [commits, setCommits] = useState([])

  useEffect(() => {
    // any other initialisation code can go here...

    // useEffect can't be async, but we can invoke an async function inside it
    const onReady = async () => {
      const { repositories, commits } = await window.ipc.signalReady()
      setRepositories(repositories)
      setCommits(commits)
    }

    onReady()
  }, [])

  const selectRepositories = async () => {
    const repos = await window.ipc.selectRepositories()
    setRepositories(repos)

    const commits = await window.ipc.getRecentCommits()
    setCommits(commits)
  }

  return (
    <div className="overflow-x-hidden">
      <div className="w-64 fixed bg-stone-900 flex flex-col inset-y-0 ">
        <h1 className="drag h-10 font-semibold text-gray-300 flex items-center justify-end border-b border-stone-800 mr-3">
          <div className="flex items-center gap-1">
            Chomp Git <ChatBubbleOvalLeftEllipsisIcon className="h-6 w-6" />
          </div>
        </h1>
        <div className="flex grow flex-col bg-stone-900 overflow-y-auto px-3.5 mt-3">
          <div className="text-sm font-semibold leading-6 text-gray-400 flex items-center px-1">
            <CodeBracketIcon className="h-5 w-5 mr-2" /> <Link href="/home">Repositories</Link>
            <PlusIcon
              onClick={() => selectRepositories()}
              className="ml-auto h-4 w-4 text-gray-400 hover:text-gray-200 ring-1 rounded-sm ring-gray-400 hover:ring-gray-200"
            />
          </div>
          <ul className="mt-5 ml-1 space-y-2 text-xs">
            {repositories.map((repo, i) => (
              <li key={i}>
                <Link
                  href={`/repository/${repo.name}`}
                  className="flex items-center text-gray-400 hover:text-gray-200 justify-between"
                >
                  {repo.name}
                  <div className="flex gap-1 items-center">
                    {!repo.isClean && <ExclamationCircleIcon className="h-4 w-4 text-yellow-400/40" />}
                    {repo.hasRemote && <RssIcon className="h-4 w-4 text-green-400/40" />}
                  </div>
                </Link>
              </li>
            ))}
          </ul>
        </div>
      </div>
      <div className="pl-64">
        <div className="divide-y divide-gray-100">
          {commits.map((commit, i) => (
            <div key={i} className="p-3 hover:bg-gray-50">
              <div className="flex gap-2 mb-2 items-center text-gray-900">
                <div>
                  <Image
                    src={`https://www.gravatar.com/avatar/${commit.avatarHash}.jpg?d=robohash`}
                    width={26}
                    height={26}
                    className="w-6 h-6 rounded-full ring-1 ring-teal-400/70 bg-gray-100"
                    alt=""
                  />
                </div>
                <div className="font-medium text-xs">{commit.author_name}</div>
                <div className="text-xs">{commit.date.substring(0, 10)}</div>
                <span className="rounded-md bg-gray-50 px-2 py-1 text-xs font-medium text-gray-600 ring-1 ring-inset ring-gray-500/10">
                  {commit.repository}@{commit.hash.substring(0, 7)}
                </span>
              </div>
              <div className="ml-0 w-full flex justify-between">
                <span className="text-sm ml-8 text-gray-700">{commit.message}</span>
              </div>
            </div>
          ))}
        </div>
      </div>
    </div>
  )
}
Our home component is now a shadow of its former self:
import Layout from '../components/Layout'

export default function Home() {
  return (
    <Layout>
      TODO
    </Layout>
  )
}
The application should still work, but we're stuck: the layout component bootstraps and maintains the repository and commit state, but
he Home component needs to be able to access it in order to move the commit feed
out of the layout and into the home page where it belongs.
Creating a context provider
A context provider is the classic way of sharing state between components and will let us achieve exactly what we need.
Create a new file at renderer/context/AppContextProvider.tsx:
import { Repository } from '../../main/shared/types'
import { createContext, useContext, useEffect, useState } from 'react'

type AppContextType = {
  repositories: Repository[]
  setRepositories: (repos: Repository[]) => void
  commits: any[]
  setCommits: (commits: any[]) => void
}

interface Props {
  [propName: string]: any
}

const AppContext = createContext<AppContextType | undefined>(undefined)

export const AppContextProvider = (props: Props) => {
  const [repositories, setRepositories] = useState([])
  const [commits, setCommits] = useState([])

  useEffect(() => {
    const onReady = async () => {
      const { repositories, commits } = await window.ipc.signalReady()
      setRepositories(repositories)
      setCommits(commits)
    }

    onReady()
  }, [])

  const value = {
    repositories,
    setRepositories,
    commits,
    setCommits,
  }

  return <AppContext.Provider value={value} {...props} />
}

export const useAppContext = () => {
  const context = useContext(AppContext)
  if (!context) throw new Error('useAppContext must be used within AppContextProvider')
  return context
}
Note that we've hoisted up the repository and commit state into this context provider and chosen to move the custom 'onready'
handling into it, too. In orer to use the provider we need to wrap the application inside it, in renderer/pages/_app.tsx:
import React from 'react'
import type { AppProps } from 'next/app'
import { AppContextProvider } from '../context/AppContextProvider'

import '../styles/globals.css'

function MyApp({ Component, pageProps }: AppProps) {
  return (
    <AppContextProvider>
      <Component {...pageProps} />
    </AppContextProvider>
  )
}

export default MyApp
Our Layout.tsx component now needs to consume the context provider in order to list repositories in the sidebar and allow
adding new ones. While we're at it, we'll remove the hardcoded content from the main container and replace it with the child
elements it should render instead:
import {
  ChatBubbleOvalLeftEllipsisIcon,
  CodeBracketIcon,
  ExclamationCircleIcon,
  PlusIcon,
  RssIcon,
} from '@heroicons/react/24/outline'
import Link from 'next/link'
import { useAppContext } from '../context/AppContextProvider'

export default function Layout({ children }: { children: React.ReactNode }) {
  const { repositories, setRepositories, setCommits } = useAppContext()

  const selectRepositories = async () => {
    const repos = await window.ipc.selectRepositories()
    setRepositories(repos)

    const commits = await window.ipc.getRecentCommits()
    setCommits(commits)
  }

  return (
    <div className="overflow-x-hidden">
      <div className="w-64 fixed bg-stone-900 flex flex-col inset-y-0 ">
        <h1 className="drag h-10 font-semibold text-gray-300 flex items-center justify-end border-b border-stone-800 mr-3">
          <div className="flex items-center gap-1">
            Chomp Git <ChatBubbleOvalLeftEllipsisIcon className="h-6 w-6" />
          </div>
        </h1>
        <div className="flex grow flex-col bg-stone-900 overflow-y-auto px-3.5 mt-3">
          <div className="text-sm font-semibold leading-6 text-gray-400 flex items-center px-1">
            <CodeBracketIcon className="h-5 w-5 mr-2" /> <Link href="/home">Repositories</Link>
            <PlusIcon
              onClick={() => selectRepositories()}
              className="ml-auto h-4 w-4 text-gray-400 hover:text-gray-200 ring-1 rounded-sm ring-gray-400 hover:ring-gray-200"
            />
          </div>
          <ul className="mt-5 ml-1 space-y-2 text-xs">
            {repositories.map((repo, i) => (
              <li key={i}>
                <Link
                  href={`/repository/${repo.name}`}
                  className="flex items-center text-gray-400 hover:text-gray-200 justify-between"
                >
                  {repo.name}
                  <div className="flex gap-1 items-center">
                    {!repo.isClean && <ExclamationCircleIcon className="h-4 w-4 text-yellow-400/40" />}
                    {repo.hasRemote && <RssIcon className="h-4 w-4 text-green-400/40" />}
                  </div>
                </Link>
              </li>
            ))}
          </ul>
        </div>
      </div>
      <div className="pl-64">{children}</div>
    </div>
  )
}
Our Home.tsx component can consume the context it cares about - the list of commits - and render the commit feed itself:
import Image from 'next/image'
import Layout from '../components/Layout'
import { useAppContext } from '../context/AppContextProvider'

export default function Home() {
  const { commits } = useAppContext()

  return (
    <Layout>
      <div className="divide-y divide-gray-100">
        {commits.map((commit, i) => (
          <div key={i} className="p-3 hover:bg-gray-50">
            <div className="flex gap-2 mb-2 items-center text-gray-900">
              <div>
                <Image
                  src={`https://www.gravatar.com/avatar/${commit.avatarHash}.jpg?d=robohash`}
                  width={26}
                  height={26}
                  className="w-6 h-6 rounded-full ring-1 ring-teal-400/70 bg-gray-100"
                  alt=""
                />
              </div>
              <div className="font-medium text-xs">{commit.author_name}</div>
              <div className="text-xs">{commit.date.substring(0, 10)}</div>
              <span className="rounded-md bg-gray-50 px-2 py-1 text-xs font-medium text-gray-600 ring-1 ring-inset ring-gray-500/10">
                {commit.repository}@{commit.hash.substring(0, 7)}
              </span>
            </div>
            <div className="ml-0 w-full flex justify-between">
              <span className="text-sm ml-8 text-gray-700">{commit.message}</span>
            </div>
          </div>
        ))}
      </div>
    </Layout>
  )
}
Finally, although it won't do much yet, wrapping our RepositoryView in the Layout component will let
us navigate between the timeline view and a repository view while preserving the list of repositories in the sidebar:
import Layout from '../../components/Layout'

export default function RepositoryView() {
  return (
    <Layout>
      <h1>Repository View</h1>
    </Layout>
  )
}
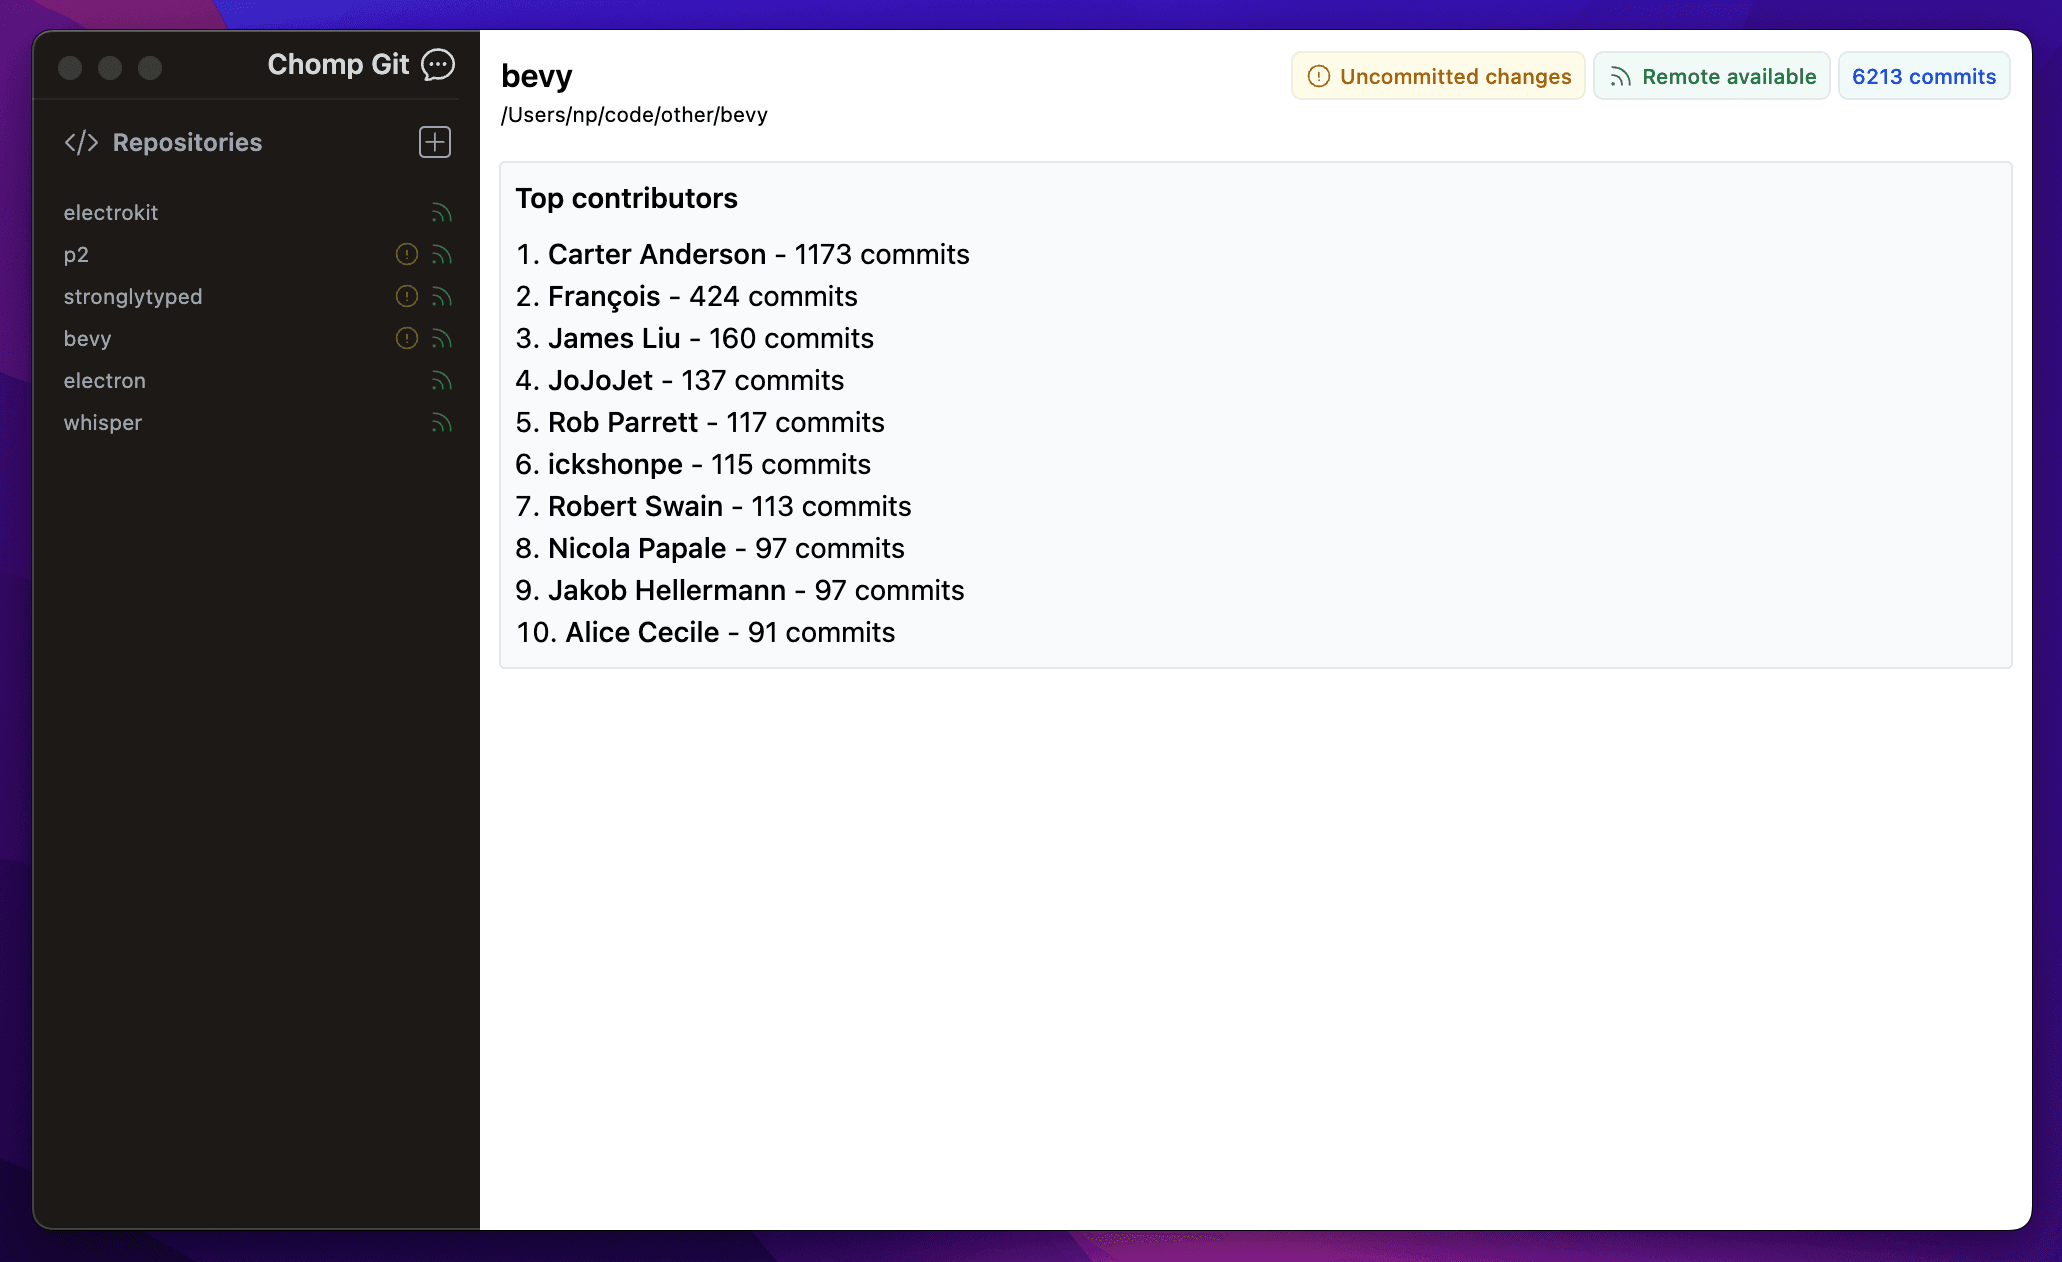
Implementing the repository view
This is the last feature we'll add in this article before making some stylistic tweaks. Much like the rest of the application,
it's not going to win any design or functionality awards, but it should give you an idea of how to move forward with your
own apps. Replace the placeholder content in repository/[name].tsx with:
import { ExclamationCircleIcon, RssIcon } from '@heroicons/react/24/outline'
import { useRouter } from 'next/router'
import Layout from '../../components/Layout'
import { useAppContext } from '../../context/AppContextProvider'
export default function RepositoryView() {
const { repositories } = useAppContext()
const router = useRouter()
const { name } = router.query
const repository = repositories.find((repo) => repo.name === name)
const commits = repository?.commits || []
const commitsByContributor = commits.reduce((acc, commit) => {
if (acc[commit.author_name]) {
acc[commit.author_name]++
} else {
acc[commit.author_name] = 1
}
return acc
}, {})
const topContributors = Object.entries(commitsByContributor)
.map(([name, count]) => ({ name, count: count as number }))
.sort((a, b) => b.count - a.count)
.slice(0, 10)
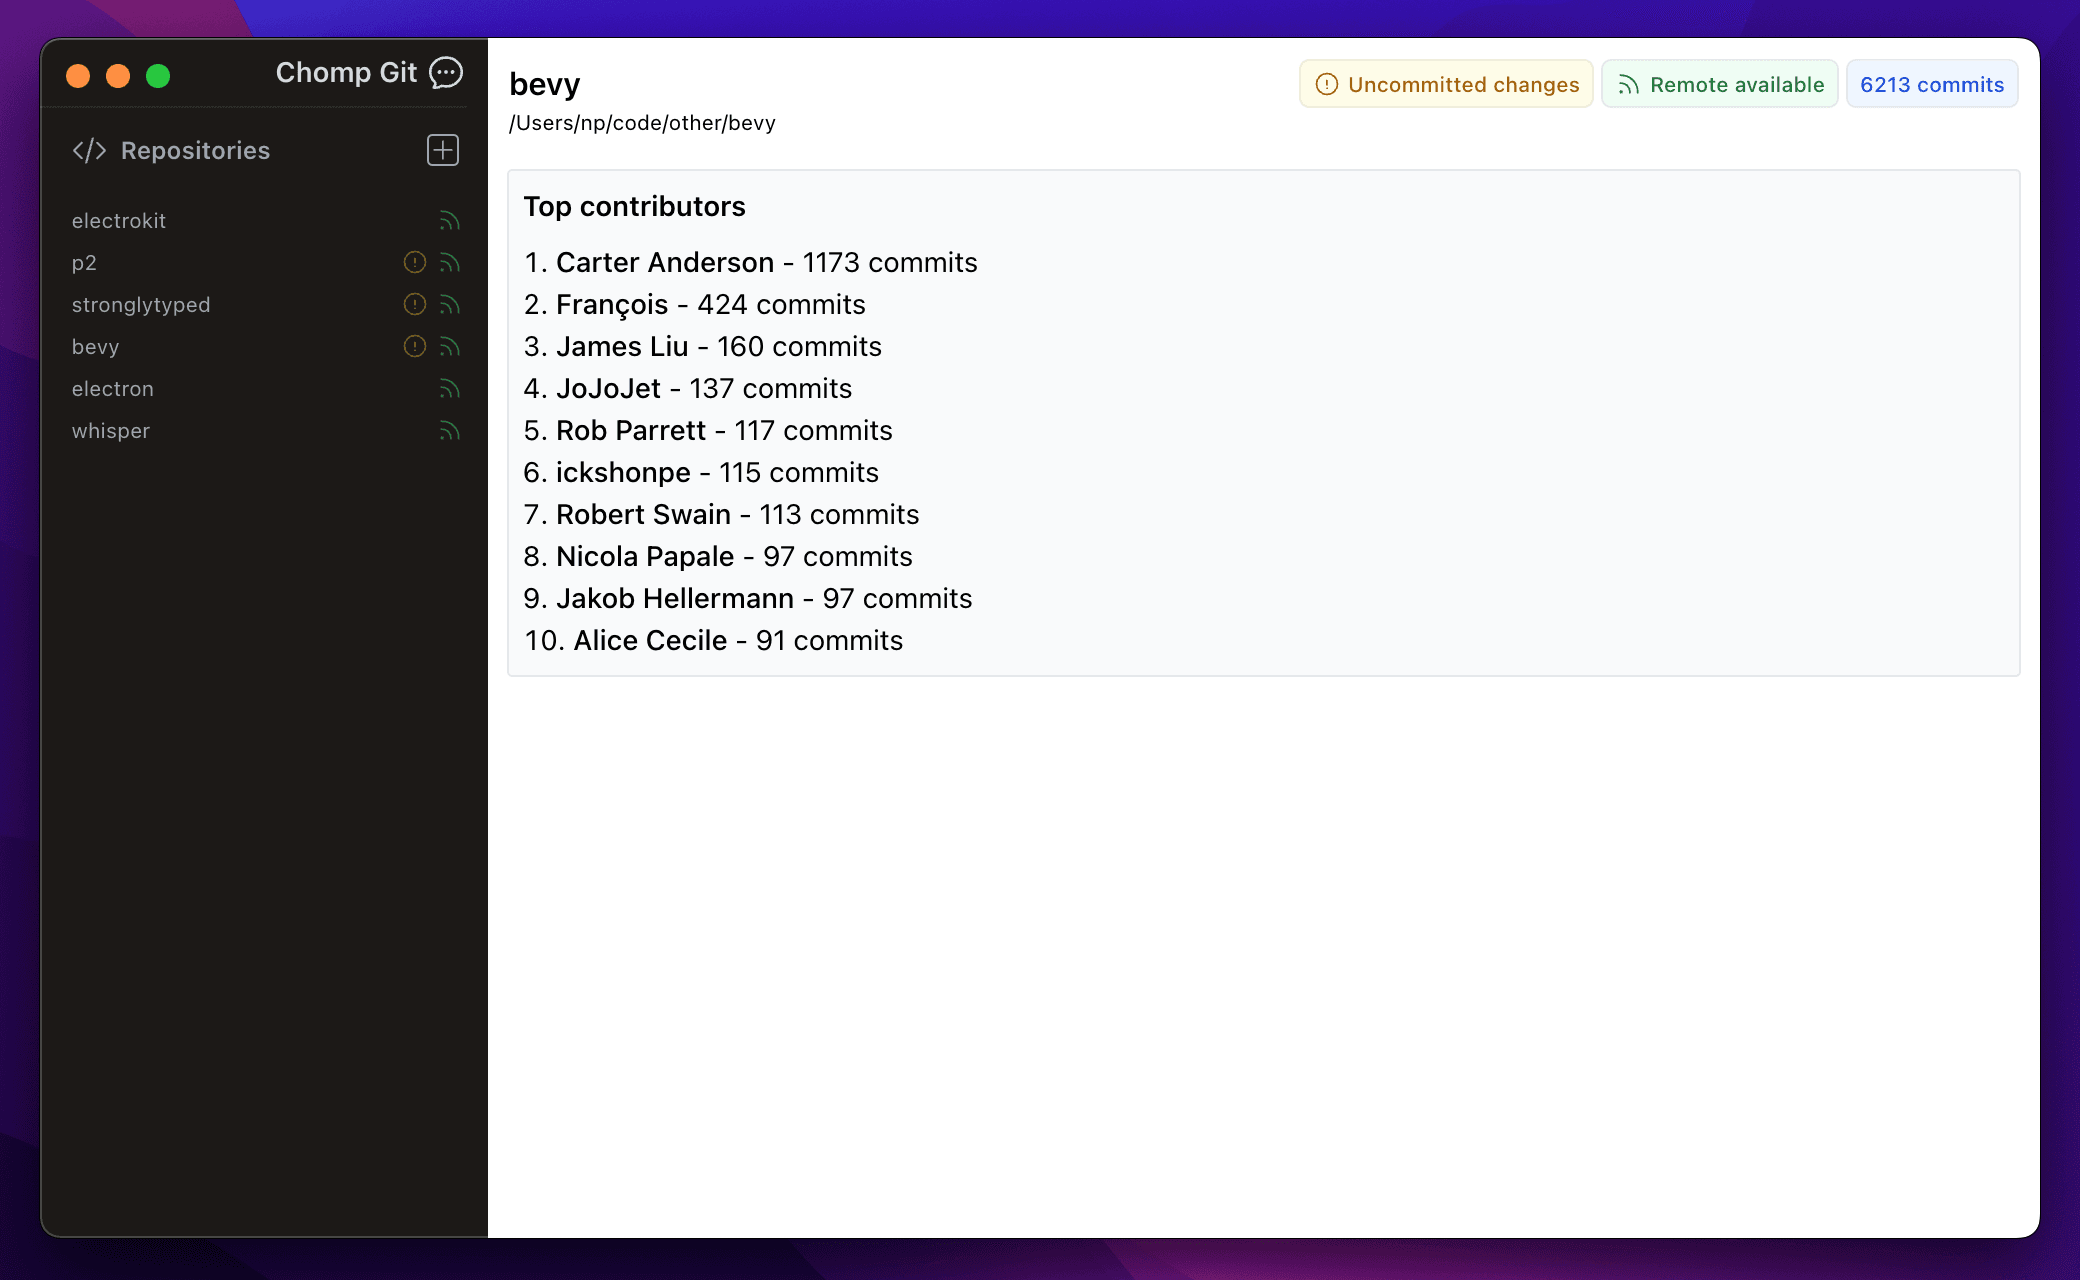
return (
<Layout>
{repository && (
<div className="p-3">
<div className="flex justify-between">
<h1 className="text-lg font-semibold">{repository.name}</h1>
<div className="flex gap-1">
{!repository.isClean && (
<span className="flex items-center gap-1 rounded-md bg-yellow-50 px-2 py-1 text-xs font-medium text-yellow-700 ring-1 ring-inset ring-gray-500/10">
<ExclamationCircleIcon className="h-4 w-4" />
Uncommitted changes
</span>
)}
{repository.hasRemote && (
<span className="flex items-center gap-1 rounded-md bg-green-50 px-2 py-1 text-xs font-medium text-green-700 ring-1 ring-inset ring-gray-500/10">
<RssIcon className="w-4 h-4" />
Remote available
</span>
)}
<span className="flex items-center rounded-md bg-blue-50 px-2 py-1 text-xs font-medium text-blue-700 ring-1 ring-inset ring-gray-500/10">
{repository.commits.length} commits
</span>
</div>
</div>
<h2 className="text-xs mb-5">{repository.path}</h2>
<div className="bg-gray-50 rounded-sm ring-1 ring-gray-200 p-2">
<h2 className="font-semibold mb-2">Top contributors</h2>
<ol className="list-decimal list-inside">
{topContributors.map(({ name, count }) => (
<li key={name}>
<span className="font-medium">{name}</span> - {count} commits
</li>
))}
</ol>
</div>
</div>
)}
</Layout>
)
}
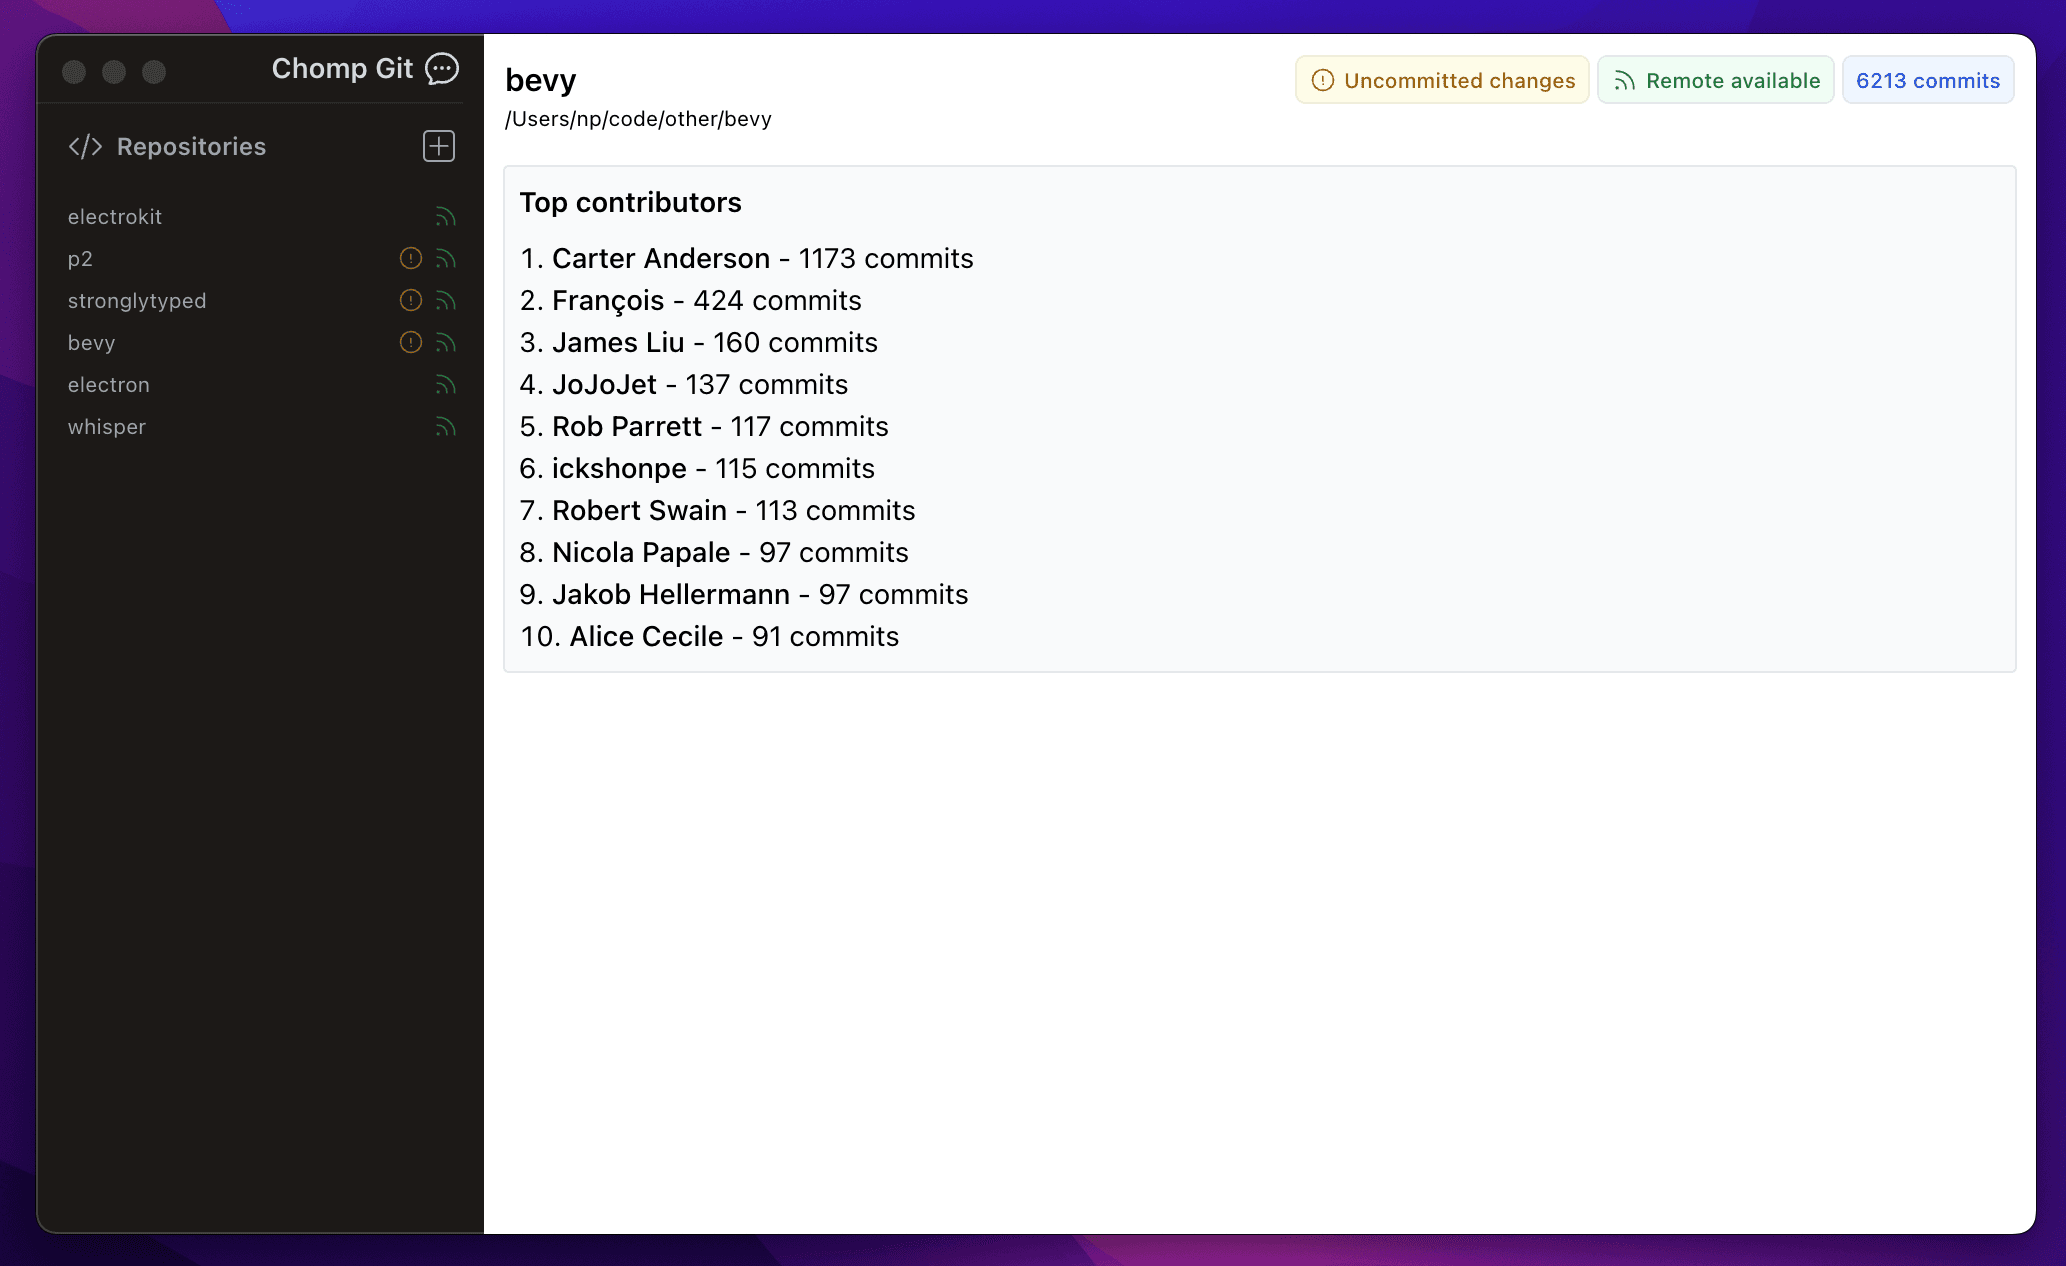
And you should now see something like this:
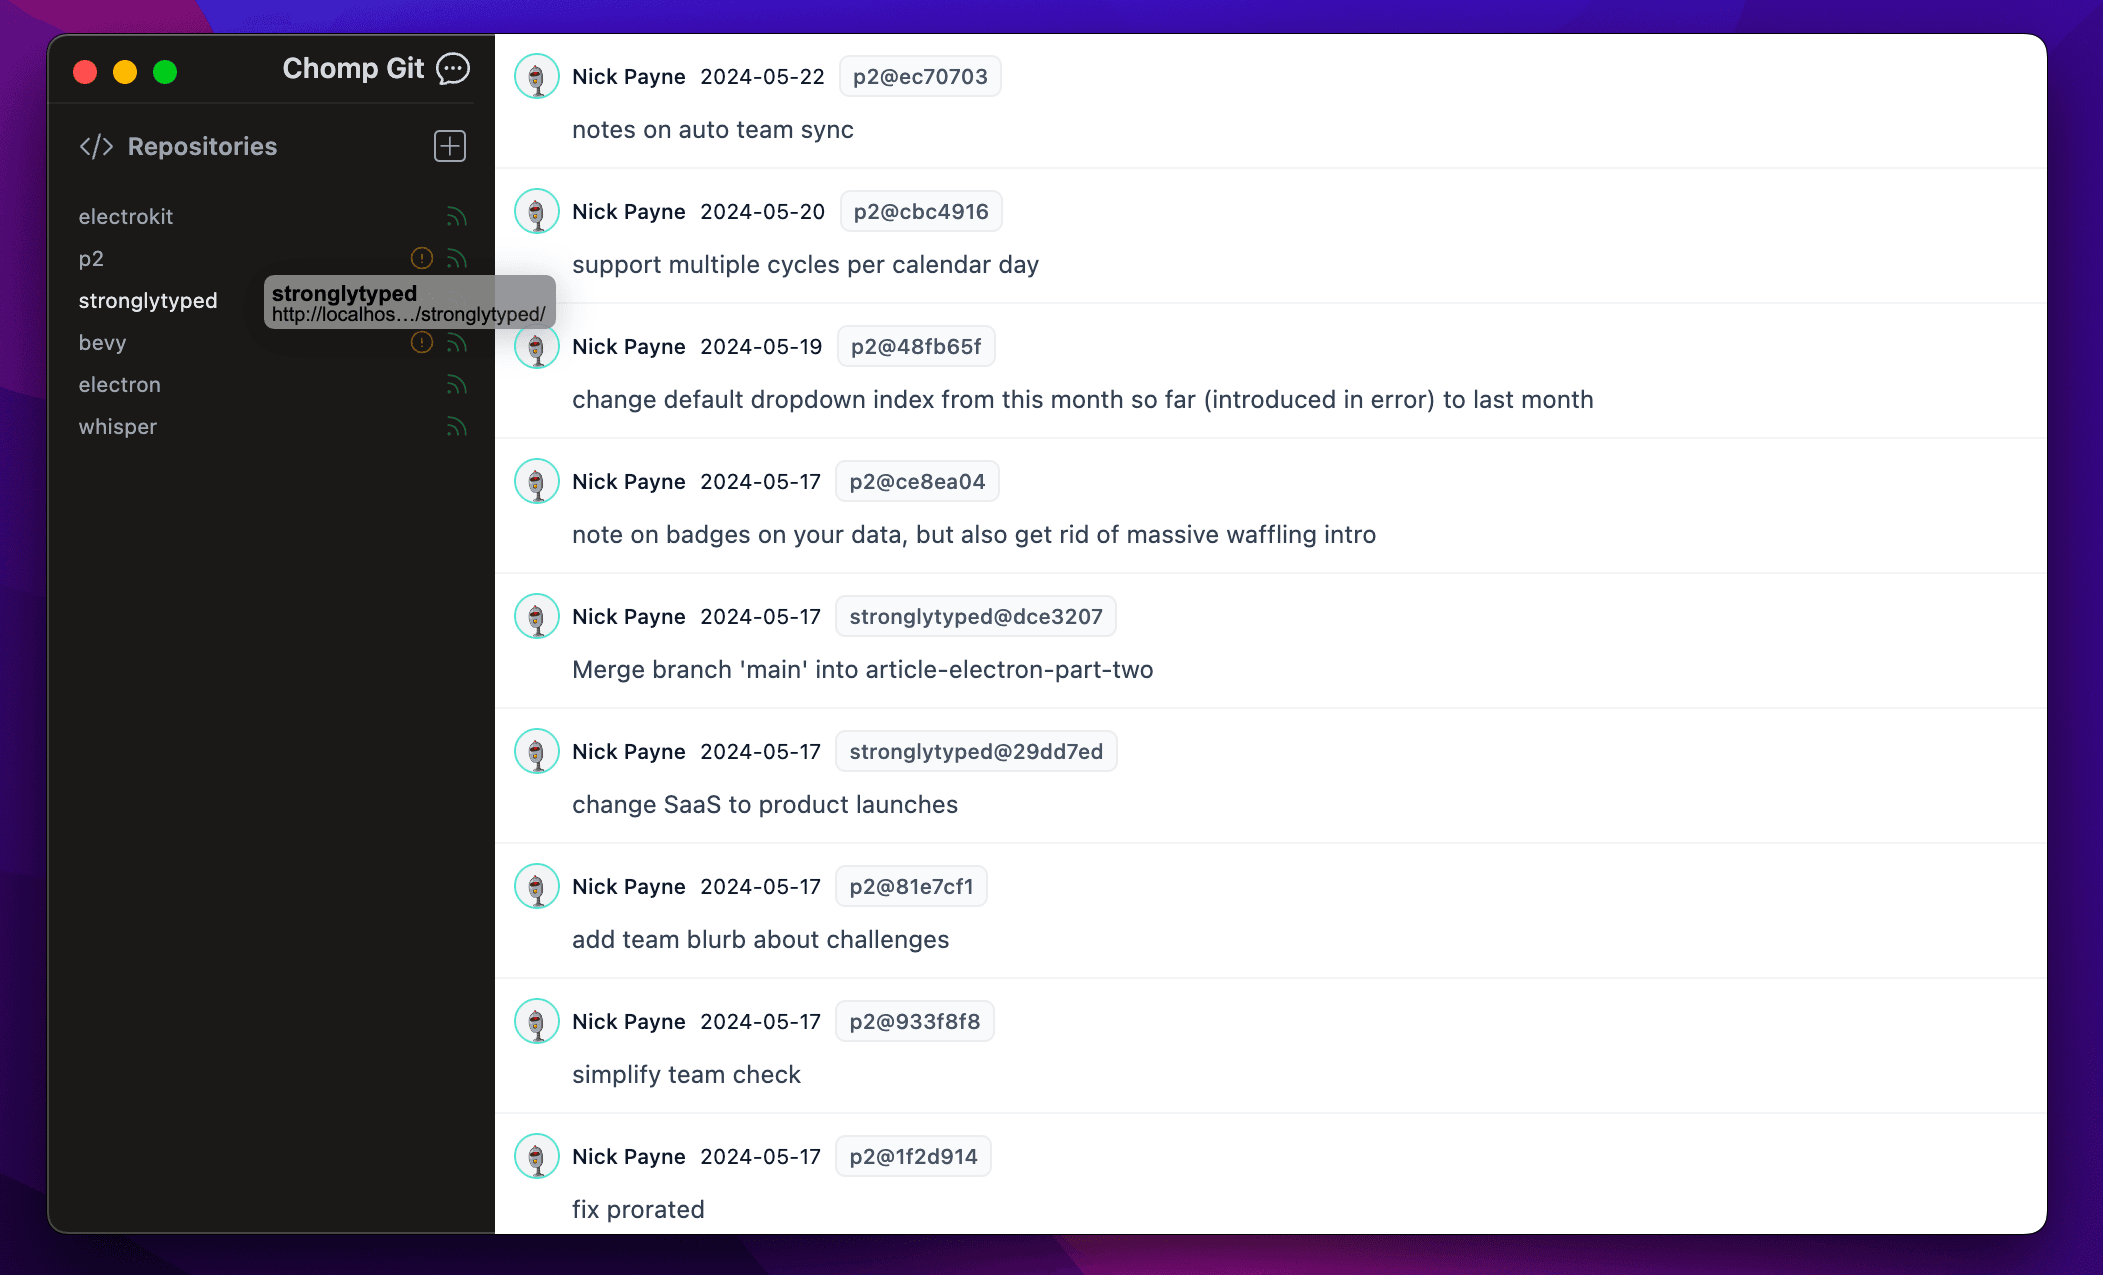
Navigating back to the timeline view
The application currently only allows navigating to and between repositories, so we need a way to get back to the timeline view. The
‘Chomp Git’ logo in Layout.tsx feels like natural home for this, so let's make it a link back to the home page:
<h1 className="drag h-10 font-semibold text-gray-300 flex items-center justify-end border-b border-stone-800 mr-3">
  <Link href="/home" className="flex items-center gap-1 no-drag">
    Chomp Git <ChatBubbleOvalLeftEllipsisIcon className="h-6 w-6" />
  </Link>
</h1>
Notice that I've added a no-drag class to the link, but haven't defined it yet (and it is not a Tailwind CSS utility class).
The very first thing we did in this article was to make the entire header containing the logo draggable, which intercepts
click events unless explicitly prevented from doing so. Add the following to styles/globals.css in order to define no-drag and make
the link work as expected:
.no-drag {
  -webkit-app-region: no-drag;
}
Navigation sorted. Application state sorted. Persistent state sorted. Things are coming together nicely.
Making things feel more native
We've already implemented the big changes here by removing the default title bar and reducing the base font size of our application. But there are still a few tells that break the illusion of a native application.
Some elements can be dragged around
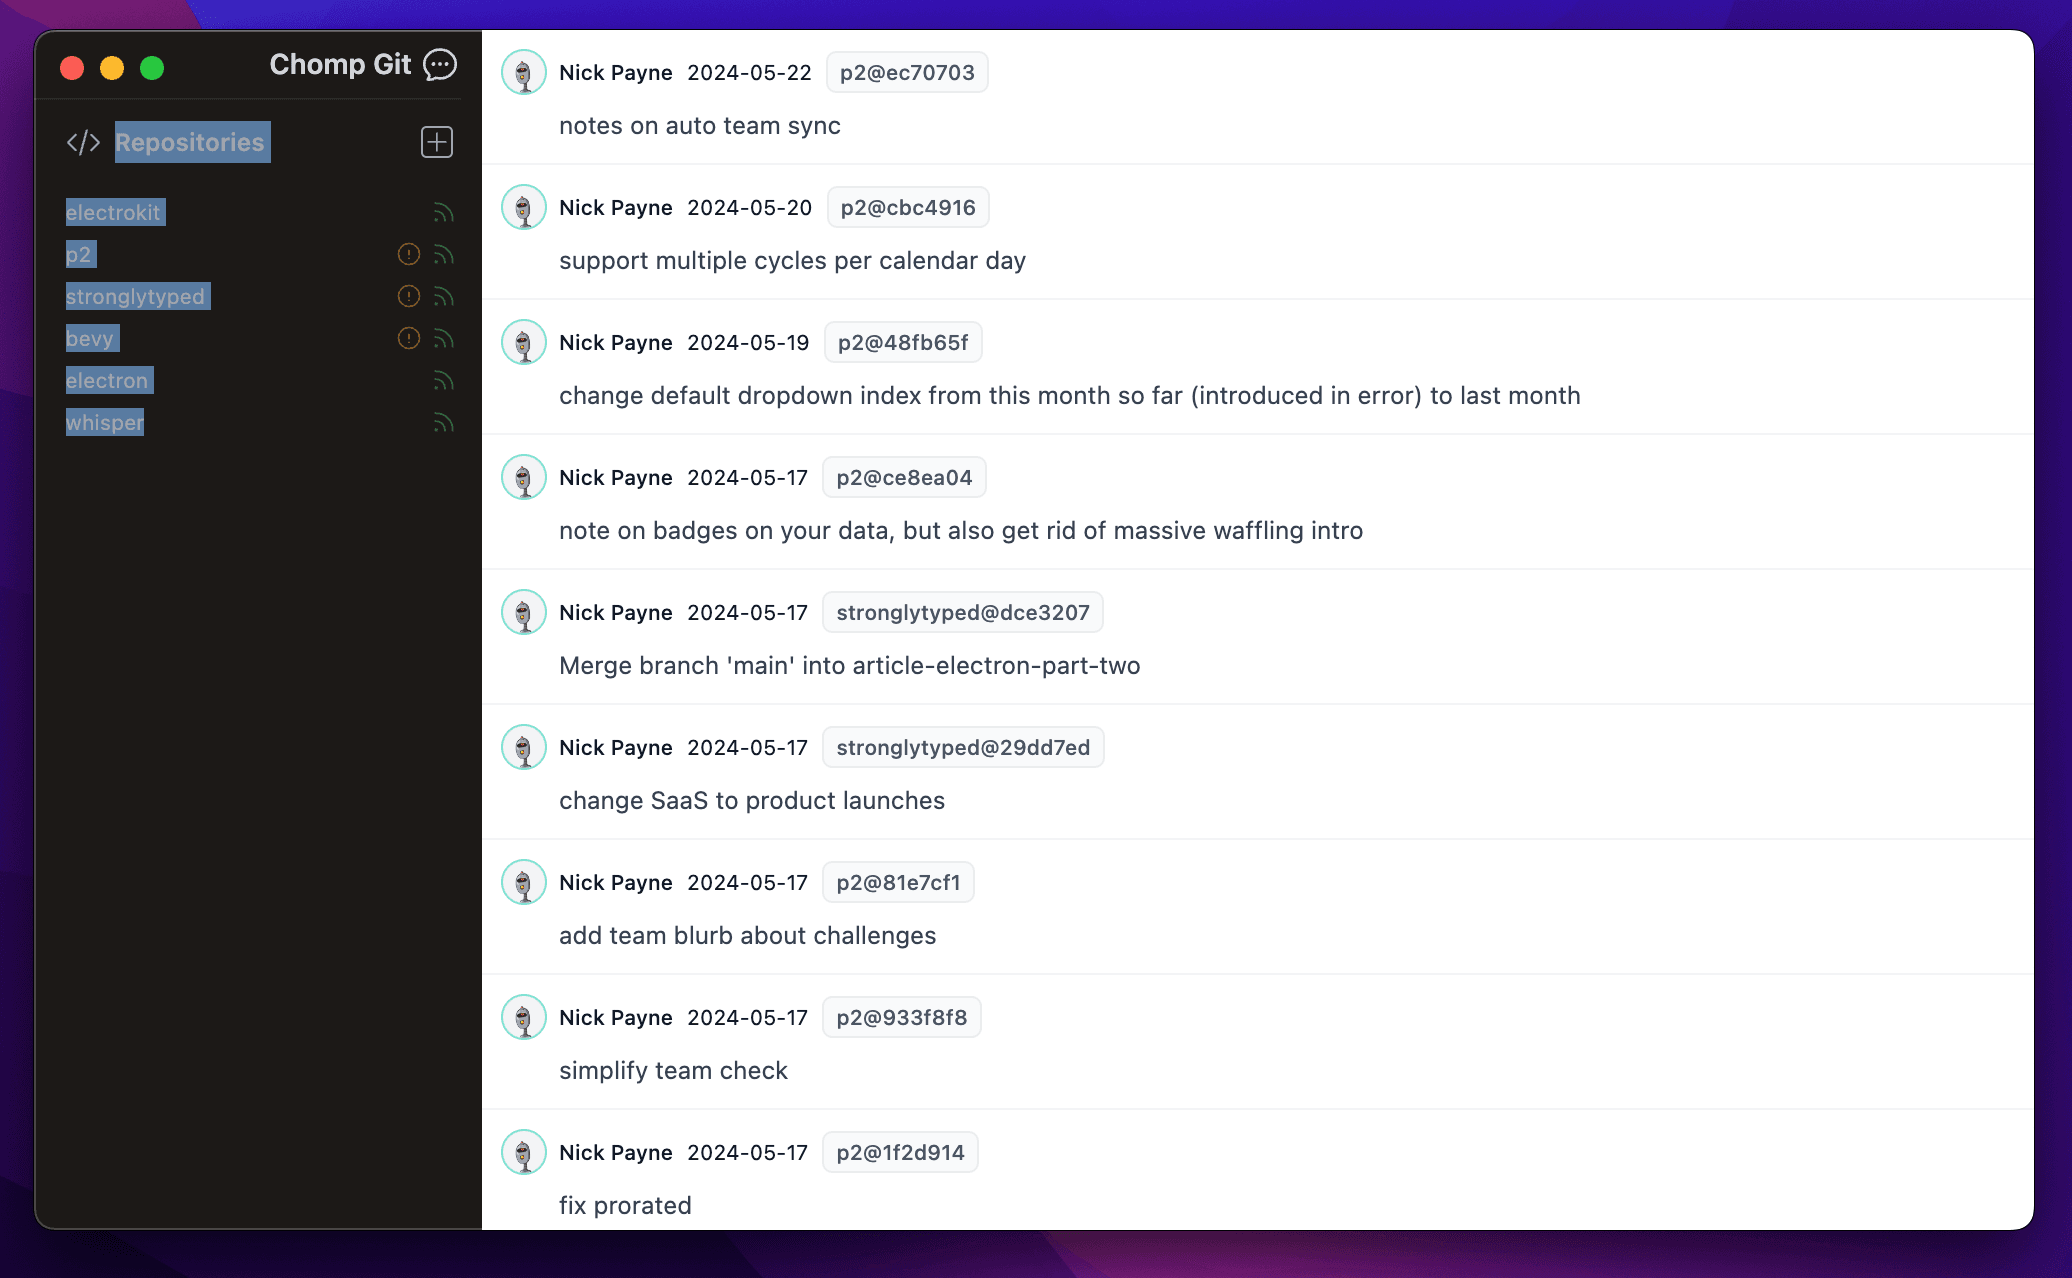
This is most noticeable when a user accidentally clicks and holds on a link:
Yuck. While we're not trying to fool our users into pretending our application is something it's not, this kind of jarring user experience is a subtle but very real distraction. The chances are a user will make it happen accidentally, and it's ugly and revealing when they do. Luckily as before, there is a simple enough CSS fix to the rescue:
a {
  -webkit-user-drag: none;
}
I've chosen to apply this as a blanket rule to all links, because there is no scenario I can think of where you wouldn't want it. You're free to make it a class and selectively apply it if you want to.
Links use the wrong cursor style
This is another one lifted from Vadim's article, and one that if you're used to web development is very easy to overlook. Links don't exist in native applications, and neither does the 'pointer' cursor. We can one more style to the rule we made above to fix this:
a {
  -webkit-user-drag: none;
  cursor: default;
}
Some elements can be selected
This is another sharp edge which can quickly burst the native bubble, but yet another easy fix. We can add a rule to prevent text selection and apply it to the entire application:
html {
  font-size: 14px;
  -webkit-user-select: none;
}
Which prevents a user from being able to do something like this:
There is a gotcha here; as with draggability, sometimes you do want to let the user select some text (particularly if they should be able to copy it). That's easily catered for by adding a class which can be selectively applied to re-enable text selection:
.allow-select {
  -webkit-user-select: text;
}
I'm not going to do so in this article, but it would probably be sensible to apply this class to a few areas of the application like commit messages.
Text antialiasing
This one is more a matter of personal preference: whether or not to use the webkit default subpixel antialiasing. Personally, I always find things look a little crisper applied at pixel level, but it's worth experimenting with to see what you prefer:
html {
  font-size: 14px;
  -webkit-user-select: none;
  -webkit-font-smoothing: antialiased;
}
Note that tailwind provides the subpixel-antialiased and anti-aliased utility classes out of the box, so you can selectively
apply each style if you want to. I prefer to set it globally. Image compression will probably make the following comparison look
a little meaningless, but here's a before and after applying the rule:
The text in the second, antialised image, looks a little 'thinner'. In reality, this makes it just look a little bit crisper. Have a play around and see which you prefer.
Wrapping up
Our application has come on leaps and bounds in this article. We've added application state, persistent state, navigation and a range of small but subtle look and feel improvements. You're welcome to leave it there, and you'll be in great shape if you do. However, I recommend sticking around for part three when it makes an appearance.
Part three
The third and final part of this series won't add any new functionality: instead it will focus on removing the last remaining telltale Electron signs from our application, as well as tackling a common gripe a lot of folks have with Electron apps: source code protection. Part three should be coming towards the end of July 2024, so keep your eyes peeled!